• BLOG
  • RECIPES
  • BIO
Menu

akin to bliss

  • BLOG
  • RECIPES
  • BIO
×
fullsizeoutput_a4f8.jpeg

seasons of acceptance

Charin Kent July 2, 2019

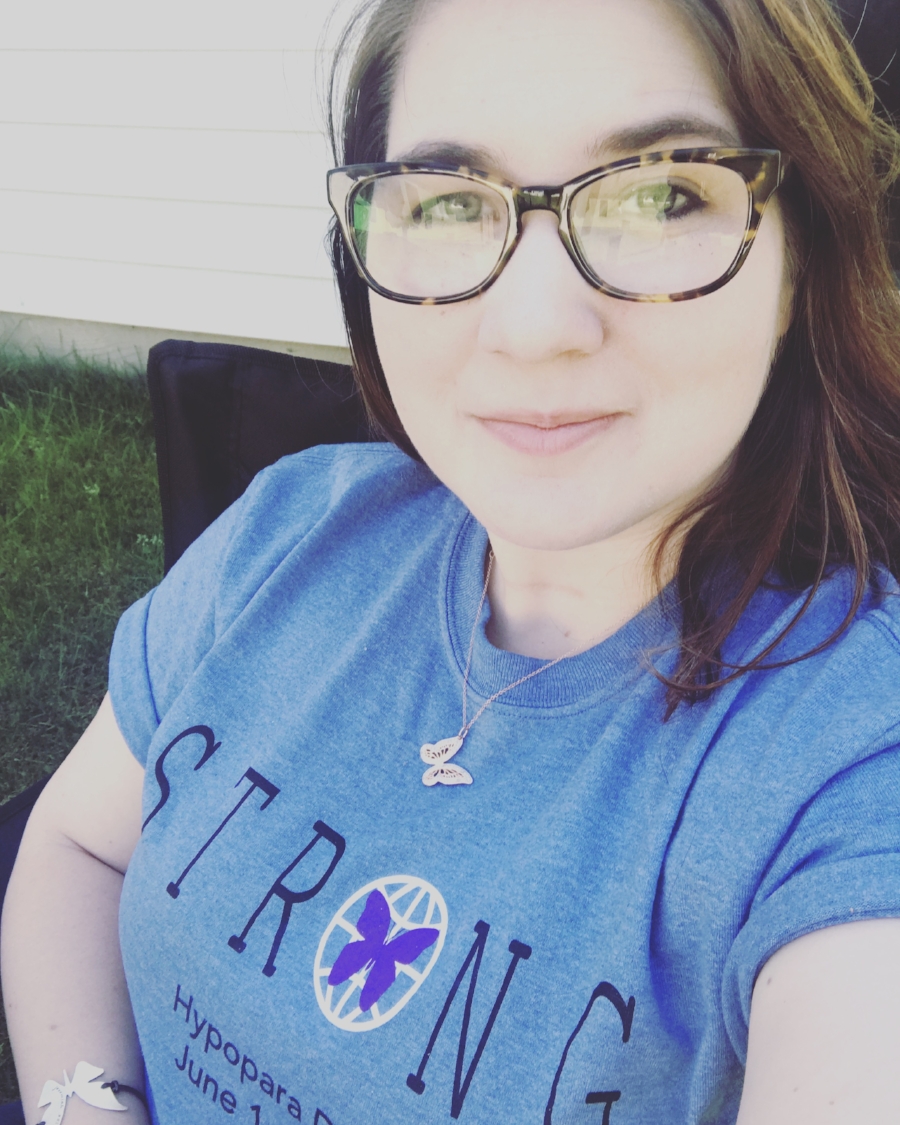
“A cake a week makes the endocrinologist go away.”

This is the title of my very first blog post. I honestly have not read that post since I published it 3 years ago because it was too hard to relive the turmoil of emotions that were at war within me during that time. 

Until today. 

I dearly wish I could shout at that girl from 3 years ago, that hope WOULD come. But, she wouldn’t have believed me, and I can’t blame her. Her definition of hope- a cure for cancer, a cure for a debilitating chronic illness, a cure for the anguish of a “normal” life lost, never came. 

Like winter shedding its biting edge before springtime, like a bittersweet farewell to a dear friend, like a butterfly emerging resiliently from its cocoon… life changed. I changed. I didn’t need a cure for the shocking life changes, I needed time to process, grow, and heal from them. 

That’s the real journey I embarked on 3 and a half years ago and it sounded like this: 

The first season was defined by SHOCK: 

“I don’t get it, I am young and relatively healthy how can I have such a rare and aggressive cancer?”

“Wait… what? The treatment that was supposed to CURE my cancer left me with a horribly debilitating chronic illness that may actually be my death sentence… WTF?” 

The second season was marked by DENIAL: 

“It won’t be that bad, I can still fight through this, my dreams and ambitions, life plans and goals don’t have to die just because my parathyroids did. I will make this work.” 

“I am making this out to be a whole lot worse than it actually is, just get over it and move on.” 

The third was unmistakably BARGAINING:

“If I just look at the bright side and appreciate what I already have, then the pain will be numbed.” 

“Accomplishing the right goals will bring back what I lost”

Then came the fourth season, whose poisonous tendrils crept up slowly and silently, DEPRESSION:

“I can barely manage my medication regimen and the cacophony of changing symptoms inside my body each day, so there’s just no point in accomplishing goals or making plans for the future.” 

“My unpredictable illness will see to it that I fail at everything I set out to do.” 

“I am just wasted space, a lifeless blob floating around without purpose.”

Then the season I struggle to even put into words because it is the rawest, most tender, and central piece of this journey… ANGER:

“God… WHY? You say you have a perfect plan, you say if I ask I will receive, you say knock, and the door will open, you say you are good, you say you are a loving father… how can that be? I pleaded for you to take away this illness and… you were silent. I begged you to give me a respite from the trials and… you brought more. Do you really hate me this much? I can’t keep coming to you like a lost child only to be shut down time and time again... I’m done.”

That’s where I sat for about a year. I gave up on my creator because I thought He had given up on me. 

Then one day in a moment of desperation I caved and begrudgingly asked for help. 

He answered, and He kept answering. He answered every question I asked and more that I didn’t even know needed answering. He opened and closed doors for me, He provided what I wanted but stubbornly refused to ask for. Did anything change with my health? Nope (in fact things have been worse), but all those seasons of shock, denial, bargaining, depression, and anger have woven together to create this: ACCEPTANCE.

This is a different era of hope. It breathes in the reality, “I am defective, different, and quintessentially quirky,” and breathes out the truth, “So what? I am loved, I am alive, I will steward this life to the best of my ability, no matter how flawed my abilities are.” That’s the plan He had in mind all along. I may not like it but I cannot deny that it is a plan that I needed more than the one that I wanted. 

My goal for this blog was to process and heal from a shocking change in my life by embracing blissful moments even in the midst of a traumatic life storm. Please envision me with tears running down my cheeks and a shocked smile plastered on my face when I say this- I accomplished that goal. The storm has subsided but that doesn’t mean that the weather is perfect, and I’m ok with that. What I learned is that life is full of seasons, each one bringing weather that can change at a moments notice. Sometimes there’s a storm that lasts for years, sometimes it lasts a day, it can rain for months, then turn into a cold and bitter winter. Believe it or not, every once in a while spring does come in all its glory. 

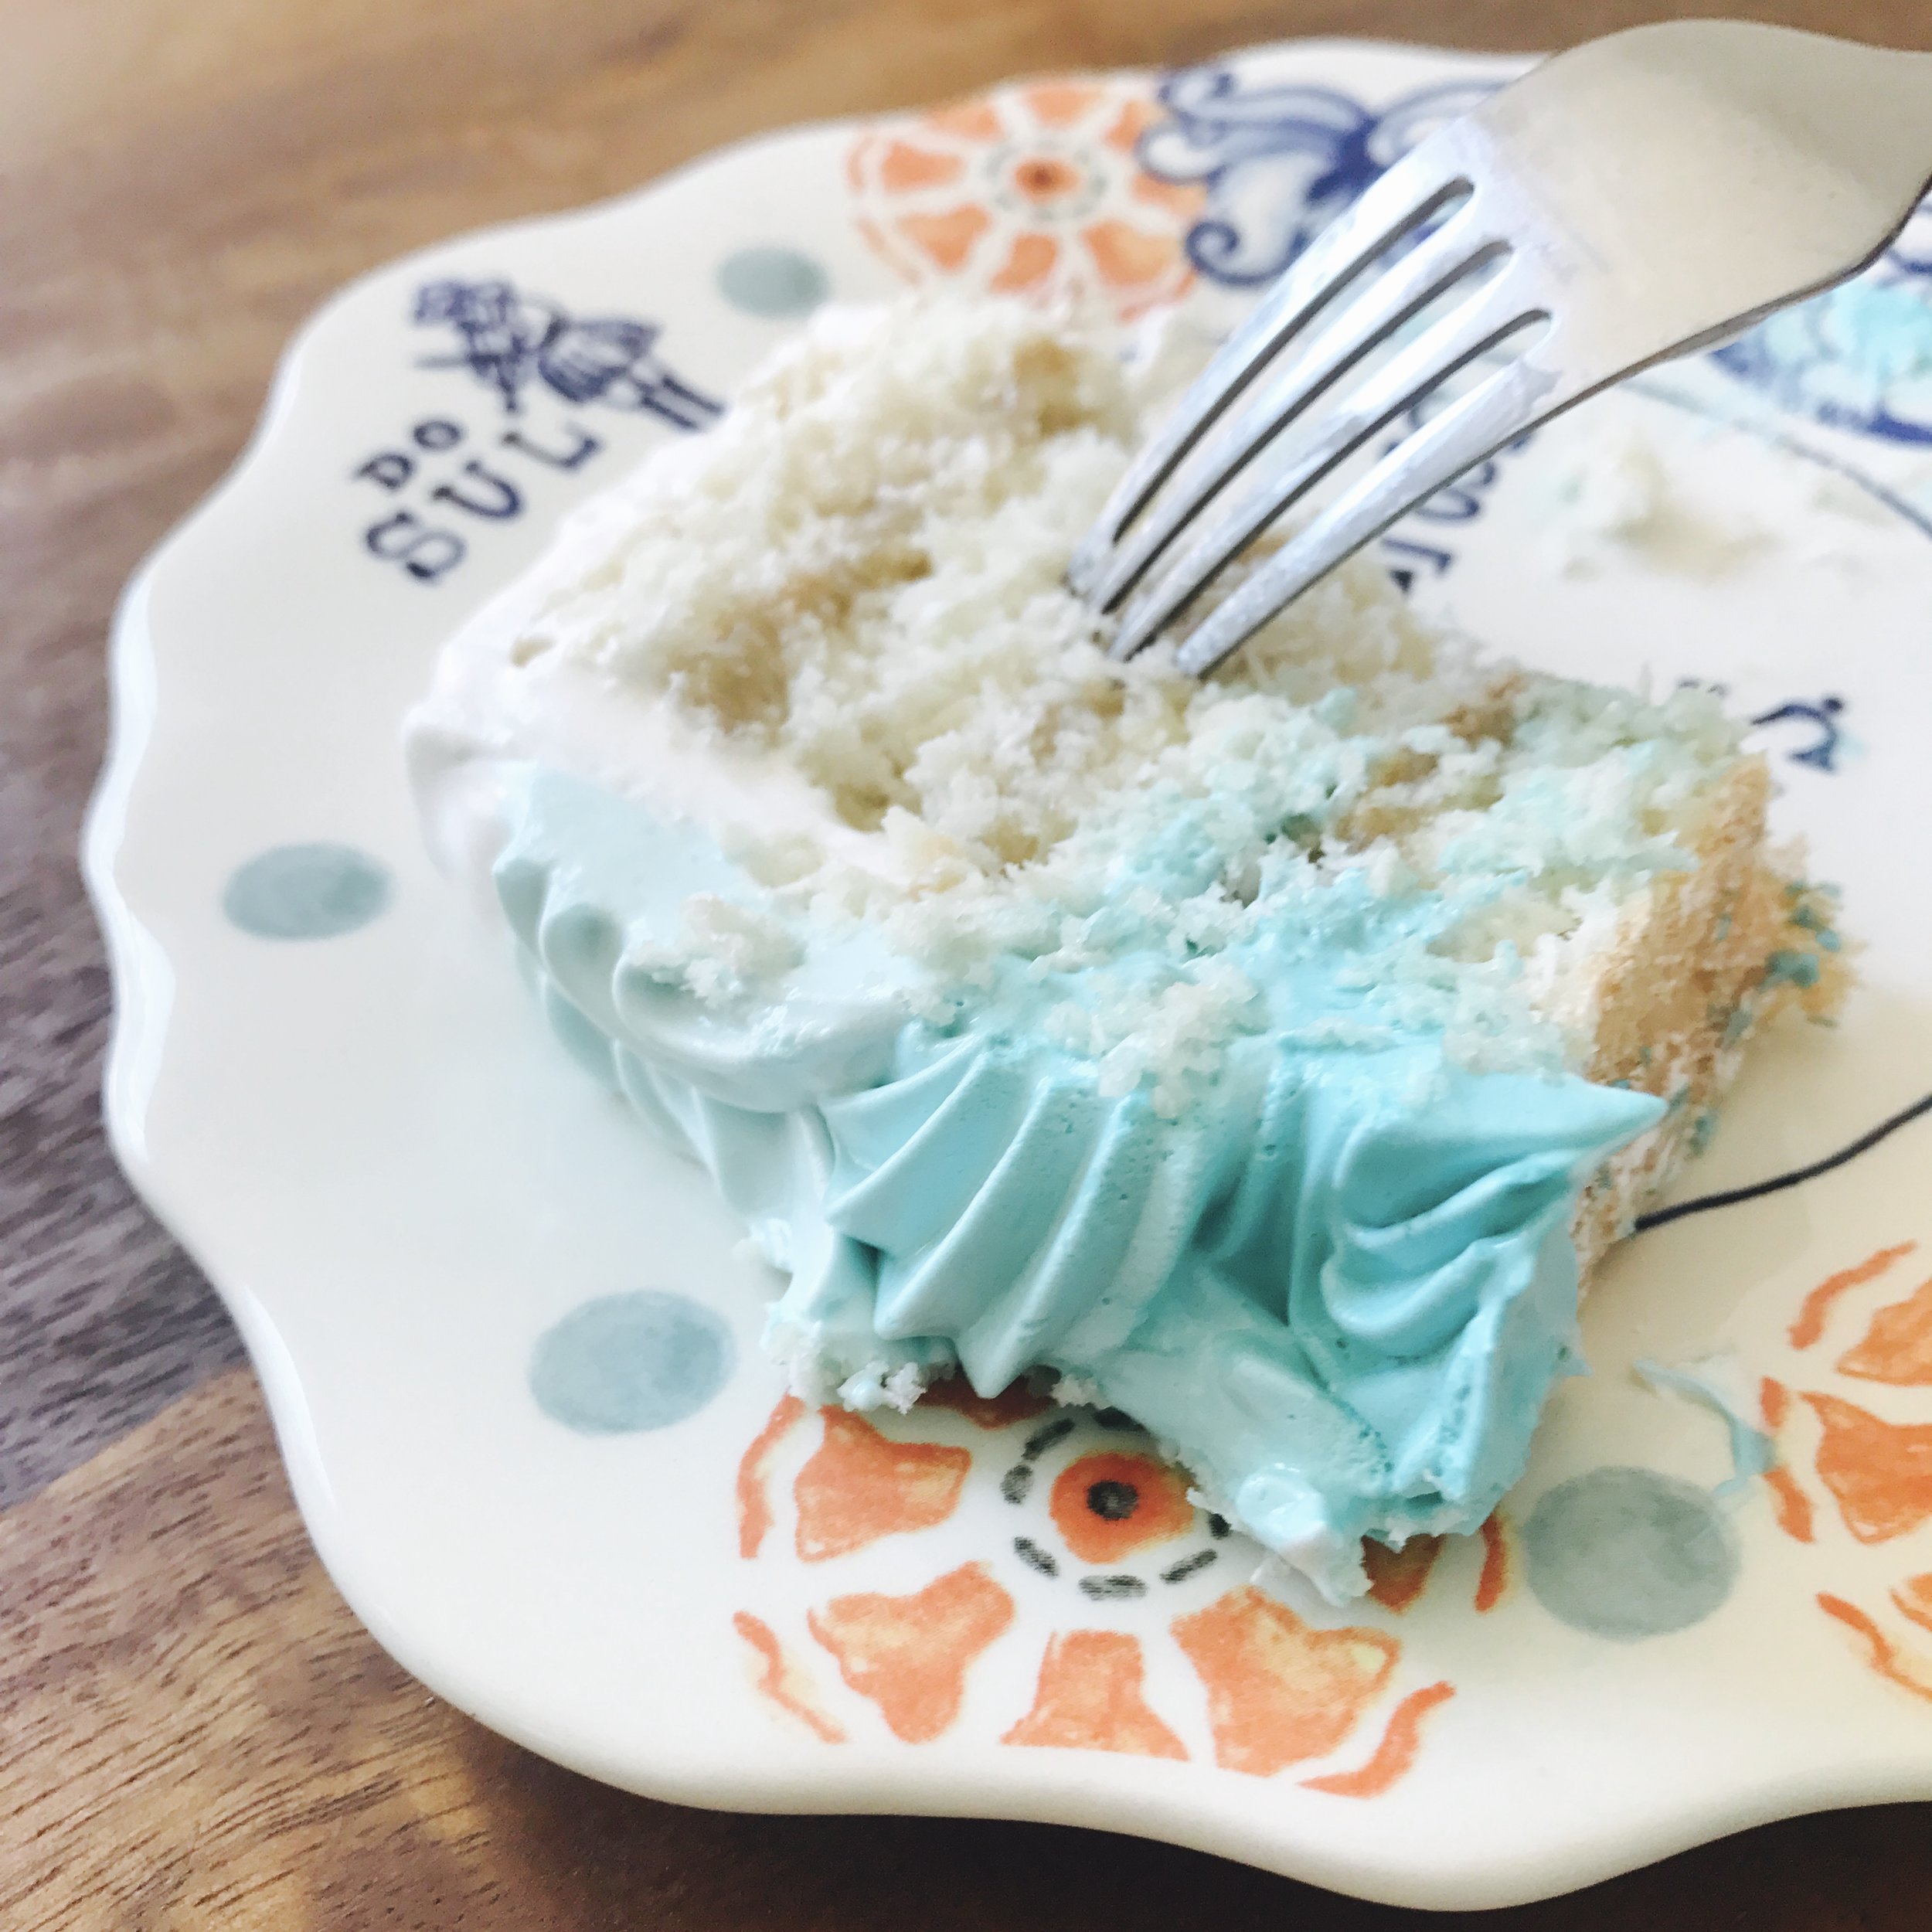
This is my story of hope transformed and it is at a close. This lovely little blog has served its wonderful purpose and the time has come to make a fresh start for the future. I have loved learning a new art form in blogging and am excited to continue using this craft in my next adventure. I hope that some part of my journey has brought even a tiny bit of sunshine to whatever weather or season you find yourself in, my friend. To end this final blog entry at Akin to Bliss, I will leave you with my son’s 4th birthday cake (the recipe for it is below ;) and my FB post that went along with it: 

fullsizeoutput_a582.jpeg

“As an artist/maker who thrives on using their hands to create, it felt like a part of my soul, or rather identity, was stripped away from me these past few weeks while recovering from surgery on my right (dominant) hand. I love to cook, I love to bake, I love writing, I love jewelry making, I love trying my hand at new skills. ‘Creating’ is my go-to form of self-care, I really do love it that much. So, when I realized how extensive recovery would actually be and how much it would strip me of the ability to do anything I truly enjoyed, let’s just say I did not react (or listen) very well, lol. Even though it was a horribly depressing few weeks, it ended up being a beautiful reminder that I am not what I make, my worth is not tied to what I create, and I am loved even when I have literally nothing to offer or show for it.

Today I am so thankful for even the little things like being able to make this sweetly simple cake for my son’s birthday. I didn’t think I would be able to make it because my hand is still in pain and recovering, but here I am, beaming with joy over one of the simplest cakes I have ever made because I am so thankful for the ability to create anything at all.

To all who surrounded me with care and support these past few weeks- THANK YOU, you truly have no idea how much every meal, word of encouragement, and prayer spoke to and cared for my soul. ALSO- the lump in my hand was determined free of any cancerous tissue, woohoo!”

‘Blue’ blueberry birthday cake

Vanilla Blue Cake

Ingredients

1 cup unsalted butter, at room temperature

1 1/3 cups granulated sugar

1 teaspoon kosher salt

4 large egg whites

1 teaspoon vanilla extract

1 cup buttermilk

2 teaspoons baking powder

1/4 cup cornstarch

2 cups all-purpose flour

1/8 tsp blue food coloring (this is totally optional and feel free to use any color, my son wanted a blue cake inside and out for his birthday, so this is how I accomplished that :)

Directions

Preheat oven to 350 degrees. Butter and flour two 8" round cake pans, tapping out the excess flour.

Beat butter, sugar, and salt together in a medium bowl. Add egg whites, one at a time, beating until combined and slightly fluffy. Add vanilla and buttermilk and beat to combine. Mix baking powder and cornstarch together in a small bowl, add about 1/4 cup batter mixture, whisk to combine. Add the cornstarch mixture back into the batter mixture and beat very well to combine. Scrape down sides of bowl and beat one second more. Add flour and mix just until it disappears. Add food coloring and mix just until blue throughout.

Divide batter evenly between pans; smooth tops. Bake until cakes pull away from sides of pans, and toothpick inserted in the middle comes out clean, about 32 to 35 minutes. Let cool in pans 10 minutes. Run a knife around edges of pans and invert cakes onto a wire rack.

Blueberry Buttercream Frosting

Ingredients:

1 cup unsalted butter, at room temperature

2 1/2 cups sifted powdered sugar

Pinch of fine salt

1 cup blueberries

1/8 tsp blue food coloring, if desired

Directions

Puree and then strain blueberries, set aside. Beat butter, powdered sugar and salt together with the paddle attachment of a stand mixer until fluffy, then slowly add about 1/4-1/3 cup of blueberry puree until smooth. Add desired amount of blue food coloring to bring out the blue color. (this is totally optional, my son wanted a very blue cake and using the blueberry puree by itself will give the cake a grayish lavender hue, if you want blue as pictured, add some color to it :)

Assembly

-Multi colored sprinkles of choice

Note: If you are unfamiliar with leveling, cutting, or frosting cakes I would suggest checking out this tutorial before this next step. 

Level each cake layer. Place the first layer of cake on a disposable cake round or cake plate. Fill the first layer with enough buttercream to form a 1/2" layer of buttercream, making sure a small amount spills over the sides evenly. Place a layer of cake over the filling. Frost the cake with remaining buttercream. Gently pour sprinkles from your hand towards the bottom of the cake, allowing some to bounce back on to the cake to cover the bottom of the cake as desired. sprinkle a little on top middle of the cake, add a candle or six, et voilà, you are done!

*This recipe has been adapted from Smitten Kitchen’s Confetti Party Cake recipe

fullsizeoutput_7137.jpeg

I fell in love with chicago in the summer

Charin Kent August 30, 2018

There is a nameless emotion that sits between regret and longing, reminiscence and shame. That feeling you get when you stop, look back, remember, and wonder… What if? What if life had dealt you a hand that was easier, what if you knew then what you know now, what if you made a mistake, what if you didn’t, what if… 

It’s an enticing rabbit hole of thoughts and dreams, one that is intoxicating but has more allure to some and not as much to others. I am not really one to partake in a stroll down this particular path of the “memory lane” trail but what first started as an innocent house project of creating a family history picture gallery, turned into a deep spiral down the rabbit hole. As I pored through pictures of the last 11 years of my life I realized that there is a reason I don’t like to walk the trail of “what if’s”, and that is simply because it often leads back to an answer, that I hate- “I don’t know.” 

I am your typical “Type B” personality, the first to run away from a perfect schedule, the last to run towards regular routine, the most open to spontaneous adventure, and the least likely to work a 9-5’er. You’d think with all this openness I would simply be able to shrug off the unknowable, but this simply is not the case. There are things I want to KNOW. Like, did my actions make a change for the good? 

I don’t know.  

And I don’t want the sweet hurried answer, “OF COURSE it did!” and all the variations therein. I want MORE than a simple answer, I want certainty. And yet, I realize that there are some questions that simply have one answer… 

I DON’T KNOW.

My coping mechanism, if you will, for dealing with the unknown of my past is to run headlong down another rabbit hole- the “What if?” of my future. Now THAT is much more tantalizing because it smells sweetly of endless possibilities that I (seemingly) CAN control. “What if I changed?” “What if this opportunity is given to me?” “What if I got better?” “What if life finally becomes easy?” I can at least take many of these thoughts and run headlong into a meaningful future, but am I really in control of it?

I don’t know.

Really, I don’t. 

Rose tinted, dreamy picture of Chicago taken by me 10 years ago.

Rose tinted, dreamy picture of Chicago taken by me 10 years ago.

The best example I can give to flesh this rabbit trail out is my move to Chicago. We, my husband and I, came to Chicago convinced we could radically change it. We thought we knew this city because we researched it and took an exploratory 4 day “thorough” tour. We fell in love with the city during a tantalizing summer. We said we would never EVER leave. We saw the brokenness and the beauty and we laid plans of how we would lay down roots and help. We executed the plans. The plans did not go as we anticipated. Some good was done, but not nearly as much as we had hoped. So we regrouped and tried again. And again. And again. 

We have lived in Chicago for nine and a half years. Have we changed it? I don’t really know. Maybe a little? Not nearly as much as we had anticipated. Are we going to leave? No… but I’d be lying if I said I haven’t seriously considered it. Do I know this city? Nine and a half years and I would say that I have barely scratched the surface. Am I still “in love” with it? This SoCal lover is still undecided on that front, but I love what Chicago holds. What brought me here is now completely different from what keeps me. I fell in love with the city in the summer but didn’t anticipate the winters and storms ahead. Do I regret moving here? No. But… if my 23 year old self knew what the next 9 and a half years held, I don’t think she would have chosen to move to Chicago. But I am not her.

I DO know that if I didn’t make a change in Chicago, I still tried to love those around me as best I could. 

I DO know how to keep trying even if it seems to only take me a centimeter closer to change. 

I DO know that if I made mistakes, I am forgiven. 

I DO know that the rabbit trails will always haunt and fascinate me.

I DO know that some trails have chasms of depression lining them, and others rain down terrifying anxiety.

I DO know that I have fought fiercely to climb out of many chasms and shield myself from countless rainstorms.

One way in which we were convinced that we would take Chicago on by storm was by helping my brother and his wife start a dynamic church here in the city, and we did. My church has gone through much change and shifting with several different looks and feels over the years but, the beautiful heart and soul of loving God and loving others as best we can has always been at the center. Sadly though, the time came recently for us to close this church that we poured our heart and soul into and have been sincerely blessed to be a part of. This past Sunday was the last time in which our little church body gathered together and it was incredibly bittersweet. I have sincerely never been in community with such a wholeheartedly accepting, loving, grace-filled group of sweet friends in my entire life, but we knew the time had simply come for us to move on to new church communities. And of course in my own Charin fashion, I baked a cake for the momentous occasion. It wasn't anything fancy, extravagant, or pretentious it just reflected the sweet brightness of this group that I have had the absolute pleasure of communing with over the years. Below you'll find a hazy love filtered picture of this tribe of mine that have stood by my side during my darkest times. I KNOW that my life will forever be changed for the better because of people like these. 

My journey in Chicago has taught me resilience and strength, vulnerability and wisdom, appreciation and humility and that I am NOT in control of everything, but I have been, am, and will be strong enough to weather every storm and THAT is so much more beautiful than knowledge itself.

IMG_0977.JPG

Strawberry Lemonade cake

Strawberry Buttercream

Ingredients:

4 large egg whites, room temperature
1 1/4 cups sugar
3/4 pound (3 sticks) unsalted butter, softened and cut in to cubes
1 1/2 cups plus 1 tbsp fresh strawberries, pureed

Directions:

Place whites and sugar in a heatproof bowl set over a pot of simmering water. Whisk until sugar dissolves and mixture registers 160 degrees on a candy thermometer.

Remove from heat, and pour mixture in to a stand mixer. Whisk on medium-high speed until the mixture has cooled and stiff, glossy peaks have formed. Reduce speed to medium, and add butter, 1 piece at a time, whisking well after each addition

With mixer on low, slowly add strawberry puree, about a 1/4-1/2 cup at a time, mixing thoroughly with each addition, beat until smooth, about 3 to 5 minutes.


Lemon Cake

Ingredients

1 cup plus 1+ tbsp low-fat buttermilk
2 1/2 cups all-purpose flour
1/2 teaspoon baking powder
1/2 teaspoon baking soda
1 teaspoon salt
2 tablespoons lemon zest
1 cup (2 sticks) unsalted butter, room temperature
1 ½ cups sugar
2 large eggs
3 large egg yolks
1/4 cup fresh lemon juice

Directions

Preheat oven to 350 degrees. Butter and flour two 8" round cake pans (or if you would like to do the 3 small cakes then butter and flour 6 4" round cake pans), tapping out the excess flour. In a medium bowl, whisk together flour, baking powder, baking soda, salt, and lemon zest.

Using an electric mixer, beat butter and sugar together until light and fluffy. With mixer on low, beat in eggs and yolks, one at a time, fully incorporating with each addition. Add the lemon juice to the buttermilk and stir with a fork. Alternately beat in flour mixture and buttermilk mixture beginning and ending with the flour mixture; mix just until combined.

Divide batter evenly between pans; smooth tops. Bake until cakes pull away from sides of pans, and toothpick inserted in the middle comes out clean, about 32 to 35 minutes. Let cool in pans 10 minutes. Run a knife around edges of pans and invert cakes onto a wire rack.

Assembly

-5 strawberries sliced, 1 strawberry whole
-Yellow food coloring

Note: If you are unfamiliar with leveling, cutting, or frosting cakes I would suggest checking out this tutorial before this next step. 

Level each cake layer. Place the first layer of cake on a disposable cake round or cake plate. Place about 3/4 cup frosting in a bowl and dye it with about 5-6 drops yellow food coloring, use more fid needed. Place dyed frosting in a piping bag fitted with a small round piping tip. Fill the first layer with enough buttercream to form a 1/2" layer, making sure a small amount spills over the sides evenly. Place a layer of cake over the filling. Frost the cake with remaining buttercream. Pipe a pearl yellow buttercream border on the bottom. Place strawberry slices above the piped buttercream. Pipe a pearl yellow buttercream border along the top of the cake. Top with a strawberry.

fullsizeoutput_70ea.jpeg
fullsizeoutput_5e47.jpeg

a rooted love

Charin Kent May 13, 2018

Tingling-ling-ling, tingling-ling-ling… tingling-ling-ling, tingling-ling-ling…” my phone’s alarm chimed loudly.

“Mama! Mama, where ARE you?” my 6 year old daughter Lily asked dutifully from across the room.

“Tingling-ling-ling, tingling-ling-ling… tingling-ling-ling, tingling-ling-ling…”

“Over here honey.” I responded with a weak smile and a slight chuckle. I knew what was coming next.

“Tingling-ling-ling, tingling-ling-ling… tingling-ling-ling, tingling-ling-ling…”

She saw me on the couch, curled up with my hands in braces, a heating pad under my neck, and a blanket over my lap and brought me my phone and thrust the screen to my face. Along with the blaring wind chime ring tone, it also displayed a message, “Take pills”, on the screen, the same message it gives me 4 different times in the day.

“Tingling-ling-ling, tingling-ling-ling… tingling-ling-ling, tingling-ling-ling…”

“Mama, you need to take your pills.” She said with all the authority of a highly trained nurse, “Where are they?”

“They’re over on the kitchen island, hun, next to your homework.”

She promptly turned around and skipped happily to the large pill box with its 28 different tiny compartments, each neatly labeled with the day and time of day I was to take my pills. She loves the precise order of this pill box. The controlled predictability of it makes her older child personality feel at ease. I, on the other hand, being a wild and free youngest child at heart only see it is a death trap, both figurative and morbidly literal. These seemingly simple pills are taken in a dull predictable order throughout the day, but the illness they were meant to treat is anything but.

She batted her 2 year old brother away as she promptly walked back to my little throne of comfort on the couch.

“I know which one you need, it’s right here, ‘MON EVE’, because today is Monday, and it is evening time because the sun has gone down, and it is almost dinner time.” She opened the tiny compartment and skillfully took out the 3 pills inside and handed them to me. “Here you go mama! Oh! you need water too don’t you? It’s ok mama, I know you’re hurting a lot today, don’t get up, I’ll go get it!”

I hate that she knows this routine. I hate that my 6 year old daughter is so very familiar with pill boxes and knows with a glance what level of pain I am at that day. I hate that she is familiar with words like “surgery” and “cancer.” I hate that these statements are a part of her daily life- “Mama has a doctors appointment.”, “Mama is hurting today and we can’t go outside to play.”, or “Mama is in the hospital and Nana is going to take care of you until she can come home." I hate that they may be bleakly joyless statements that etch themselves into her childhood memories.

I wanted her childhood to be carefree and thriving, not a never ending state of “survival mode.” I had made such ambitious plans for her to attend ballet and art classes. I had determined to set aside a time every week to teach her my blissful craft of artisanal baking. I dreamt of the future (like many moms before me have done and will continue to do) and had visions of myself volunteering for every girl scout meeting, school fundraiser and function, and of course promptly attending every single meeting. Now I am lucky if I can simply make it to a parent teacher conference, and the one function a semester that I volunteer for.

I had hoped to be in charge of my family’s story, but alas my medical history is what shapes our daily lives. A chronic illness called hypoparathyroidism that resulted from the cancer treatment I underwent, treatment which ultimately pronounced me “cancer free," a result I would never want to erase from my history. Yet, the consequent chronic illness now rules not only my own life, but that of my tiny family’s as well. So this leaves me to daily, hourly, by the minute, ask those horrific questions that every mother faces-

“Will they despise me when they grow up?”
“Will they understand that I tried my best with the cards that I was given?”
“Am I failing them if I focus on myself today?”
“Will they despise me for not giving them all that I wanted to?”
“Will they ever be able to know that I wanted so much more for our family?”
“Will they ever know a childhood that is blissful and carefree?”
“Have I ruined my family?”
“In years to come, will this childhood story, with all its bumps and twists and turns and heartbreak, still reveal how much I love them?”
“Will I even be there to tell them in the years to come?”

She looked up at me with eyes reflecting a profoundly rooted love and said,

“Mama, I love you so much, you are the best mama I could ever have. You make me so happy, I love you.”

Then she planted a slobbery wet kiss on my cheek, turned, and skipped away with my pill box in hand, happily returning it to its place on the kitchen island.


I wrote the above piece a few months ago for a friend who reached out to me asking if I'd like to contribute to a book she is working on that is a collection of short stories written by mothers about motherhood. While it was written a while ago, I wanted to wait until Mother's Day to share it with you all so as to give you my very personal tiny peek in to this crazy, horrifying, and wonderful world of motherhood.  I also made a little collection of pictures that capture the messy joy that surrounds me daily as a mom to two incredibly passionate kiddos. To all my fellow moms out there- let's keep loving those crazy kids with all we got, not let the weight of "what if's" consume us, and know that it is a magnificent accomplishment to simply do your best with the hand that life has dealt you. Happy Mother's Day!

IMG_0555.JPG
fullsizeoutput_5e4a.jpeg
fullsizeoutput_56.jpeg
fullsizeoutput_5e48.jpeg
fullsizeoutput_5e4c.jpeg
fullsizeoutput_5562.jpeg
fullsizeoutput_5e5d.jpeg
%TkUTBUXRMuO3RyOvETiYQ.jpg
fullsizeoutput_5e5a.jpeg
fullsizeoutput_5e55.jpeg
fullsizeoutput_5d66.jpeg
fullsizeoutput_5e4f.jpeg
fullsizeoutput_539e.jpeg

fear and freedom

Charin Kent March 2, 2018

I woke up drenched in sweat, panting, trying to remind myself it was only a dream… only a dream. I knew it hadn’t been real but I still had to grab our video monitor to check that my son was safe, sound asleep in bed; he was. My heart still raced. Panic still curled around my muscles, making them tighten and twitch. I poked my head in to my daughter’s room to make sure she, too, was safe and secure in bed; she was. However, my body would not let go of fear, it gripped my insides as though it was the only thing holding me back from a gruesome death. I was scared to stay awake, but too afraid to go back to sleep in case another horrific dream would plague me, making me envision my darkest horrors. It took an hour of watching my favorite benign sitcom, reading soothing Psalms, and laying on my trusty heating pad to convince my body to relax and know that the nightmare was not real, it was only a dream. And then I fell asleep.

I have suffered from nightmares my whole life, but since my thyroid was removed and I acquired hypoparathyroidism, the amount and intensity have severely increased. I know the technical reasons for it. Severe symptoms of anxiety come hand in hand with my current health state. In short, fear has become a constantly annoying companion. I should really hate this, but the fact is that it has become one of the most liberating experiences of my life.

You see, like the nightmares, I have always suffered at the hands of fear. From a very young age I gave in to the cruelly subtle game of comparison. I longed to have the looks of my athletic, perky, and dazzlingly gorgeous friend or have the witty, sassy personality of my fashion forward and perfectly popular friend. I craved the acceptance and approval they seemed to have at their fingertips. All I had was goggle-eyed glasses, chubby tummy and legs, and a whole lot of determination and imagination. I could get deeply psychological on you, my reader, as to why exactly I wanted these friends’ approval, but I personally believe that is best expressed in person over a cup of coffee or more accurately, a glass of wine. What I will tell you is that when I turned 12, I hid my goggle eyed glasses, imaginative determination, and any other childhood quirkiness so that I could be accepted by my peers.

As most of us know, people are extremely fickle (especially at age 12!) and trying to change who I was got me absolutely nowhere. I did start to find myself and accept certain parts of my quirky nature again. However, a deeply rooted pattern of comparing myself to others, living in shame of my shortcomings, and changing my behavior in order to gain approval, always lingered. As I grew older, I truly thought I had matured out of that awkward 12 year old pattern, but it took the element of fear being added in a concentrated dose to my daily life for me to realize that I had barely scratched the surface. Once fear based emotions became a daily reality stronger than I had ever thought they could be, I had a choice- do I let fear enslave and cripple me, or do I fight back and learn how to be free even when I am afraid? Because I can’t rid myself of these feelings altogether, they will still come, but I always have a choice of what to do.

fullsizeoutput_53aa.jpeg

For the most part, I have been focused on simply fighting back fears of, quite frankly, losing my life, livelihood, personality, or sanity due to my medical conditions. In so doing I would say that I have become a warrior of sorts when it comes to battling my own fears. Yet while it is still very present and stifling, I find I can be still and remember that I am free. It wasn’t until a couple of weeks ago that I realized, this warrior-like nature had fully awakened that inner determined, goggle-eyed glasses, imaginative child. At the age of 32 she was ready to play, to stretch out her arms and be free from the comparison game. She was there in all her quirky glory and gave me the strength to boldly say with confidence, “You are loved, you are accepted, and that is enough.” She is ready to change 32 year old Charin, forever.

The following pictures are of a little selfie photo shoot I did for my new job at Encantadora Jewelry. What started as a simple selfie turned into an hour long date with myself. I really really REALLY hate taking pictures of myself, but this time I had a bit of a break through. After about 20 minutes of poking, prodding, sucking in, tucking my hair just so, and attempting that “perfectly posed” angle to get that “perfect” Instagram pic, I sighed in irritation and thought, “you know what… screw it… I am going to do it my way and just have fun.” What a gift this turned out to be. While browsing through the photos afterward I stopped and let the tears roll down my cheeks, I was seeing my true reflection and I was proud of the warrior that looked back at me.

fullsizeoutput_53ab.jpeg
fullsizeoutput_53ae.jpeg
fullsizeoutput_53af.jpeg
fullsizeoutput_5296.jpeg
fullsizeoutput_53ad.jpeg
fullsizeoutput_5165.jpeg
fullsizeoutput_5131.jpeg
fullsizeoutput_51cd.jpeg

There have been many changes in my life over the past couple of months, the biggest of which I have already mentioned- a new job. I am so very happy to say that I have found a position that is a perfect fit for my future, as it provides much flexibility and I can accomplish tasks even on days when I am feeling quite ill. I also simply love working with my boss… who also happens to be my mom ;) Also, while I have not gotten any better health-wise, I have gained much rejuvenation and time for self care due to my dear sister moving up to Chicago with her daughters so as to help me and my family for the next 18 months. Their presence has lifted me up both physically and emotionally more than I could possibly say. I am so thankful for their loving sacrifice of moving and thus uprooting their whole life to be with me and my family while we are in a season of need. I am now thrilled for this new time of life I see ahead of me, one in which I discover how to rise up, walk, and LIVE my life with a chronic illness to the fullest.

IMG_2295.JPG
IMG_2430.JPG
IMG_2296.JPG

With all the added adventures in my life, I have not had much time to bake, but the following is a somewhat simple (and delicious!) recipe for Vanilla Cake and Strawberry Buttercream which is the cake that I made for my niece's (pictured above next to my daughter, Lily) 9th birthday. It is a great cake for kids birthday or for someone who prefers simplicity when it comes to their desserts. Enjoy!

Vanilla Cake

Ingredients: 

1 cup (2 sticks) unsalted butter, room temperature, plus more for pans
2 1/2 cups all-purpose flour (spooned and leveled), plus more for pans
1/2 teaspoon baking powder
1/2 teaspoon baking soda
1 teaspoon salt
1 1/2 cups sugar
2 large eggs
3 large egg yolks
2 teaspoons pure vanilla extract
1 cup low-fat buttermilk

Directions: 

Preheat oven to 350 degrees. Butter and flour two 8" round cake pans, tapping out the excess flour.

In a medium bowl, whisk together flour, baking powder, baking soda, salt.

Using an electric mixer, beat butter and sugar together until light and fluffy. With mixer on low, beat in eggs and yolks, one at a time, fully incorporating with each addition. Alternately beat in flour mixture and buttermilk mixture beginning and ending with the flour mixture; mix just until combined. 

Divide batter between pans; smooth tops. Bake until cakes pull away from sides of pans, 32 to 35 minutes. Let cool in pans 10 minutes. Run a knife around edges of pans and invert cakes onto a wire rack.

Strawberry Buttercream

Ingredients:

4 large egg whites, room temperature
1 1/4 cups sugar
3/4 pound (3 sticks) unsalted butter, softened and cut in to cubes
1 1/4- 1 1/2 cups plus 1 tbsp fresh strawberries, pureed

Directions:

Place whites and sugar in a heatproof bowl set over a pot of simmering water. Whisk until sugar dissolves and mixture registers 160 degrees on a candy thermometer.

Remove from heat, and pour mixture in to a stand mixer. Whisk on medium-high speed until the mixture has cooled and stiff, glossy peaks have formed. Reduce speed to medium, and add butter, 1 piece at a time, whisking well after each addition

If you are wanting to dye some of your buttercream for decorations then before proceeding reserve about 3/4 cup of the buttercream and set aside for dyeing. If you reserved some buttercream, then reduce the amount of strawberry puree in the next step to 1 1/4 cup. With mixer on low, slowly add strawberry puree, about a 1/4-1/2 cup at a time, mixing thoroughly with each addition, beat until smooth, about 3 to 5 minutes.

Assembly

If you are unfamiliar with leveling, cutting, or frosting cakes I would suggest checking out this tutorial before this next step. If you're a serious newbie and four layers sounds intimidating, no worries, just stick to the two layers you baked and fill with a bit more buttercream in the middle. Just be sure to still level those lovelies.  

Level one cake layer and cut it in half horizontally, then repeat with the second layer. You will now have 4 total layers of cake. Place the first layer on a disposable cake round or cake plate. Fill the first layer with enough buttercream to form a 1/2" layer, making sure a small amount spills over the sides evenly. Place a layer of cake over the filling. Repeat this process with the remaining cake layers. Frost the cake with remaining buttercream. Use any remaining buttercream to pipe desired decorations for the cake. When I made the cake pictured above for my niece I reserved about 1/2 cup of the buttercream before the strawberry was added so that I could color the buttercream as desired. I also followed this handy tutorial to pipe the rosettes on top in purple, a small star tip to pipe the tiny yellow flowers, and used a small plain round piping tip to pipe the border in black. 

fullsizeoutput_7b45.jpeg

hope

Charin Kent December 31, 2017

In thinking about what goals I have for this new year I have kept coming back to the simple four letter word, hope. If you are like me and feel as though your life is a constant cycle of 2 steps backward for every 1 step forward the word hope probably feels more like a four letter curse word rather than a word of encouragement. Throughout the past year I have pushed myself on multiple occasions to do more than I thought I could. Many times I accomplish what I set out to do (like the following pictures of the hand made Christmas Soirée I hosted) but I end up paying dearly for it with debilitating muscular pains the entire next week from the chronic illness I suffer from. Other times I quit what I set out to do before I fully accomplish my goal (like many failed attempts at a successful exercise regimen) not because I lack determination, but because the consequential pain is simply too much for me to handle whilst daily caring for my children. Any physical exertion comes with a cost for me, so I continually feel like a trapped crippled bird who yearns to simply accomplish its goal to fly freely, but is continually thwarted by its circumstances. 

From where I sit, HOPE, is an exhausting word and a word that I really want to quit right about now. And yet, despair is my constant enemy and hope my only tool to fight it. So my resolution is this- hold on to hope for a better tomorrow even if tomorrow is worse than today. Goals are incredibly easy to establish but picking myself up and never letting go of that simple four letter word, hope, is my personal marathon goal. Hold me to it friends. 

IMG_1534.JPG
IMG_1533.JPG
IMG_1530.JPG
IMG_1531.JPG
IMG_1646.JPG
IMG_1532.JPG
IMG_0964.JPG
IMG_1642.JPG
IMG_0963.JPG

A couple weeks ago I hosted my annual Christmas Soirée for our friends and family here in Chicago and though I didn't get many pictures of the party itself, the pictures above are some of the creations that I made for the evening. I treat this party as my Christmas gift to my friends and family each year and love pouring my heart and soul in to every detail. While I may have pushed myself too hard for this event (pretty much every item on that menu list above was handmade by me), it felt good to know that I still technically had it in me to pull out all the stops, but the goal for next year will be learning the art of "reigning it in" a bit so that I can thoroughly enjoy the holidays, lol. Below is the recipe for the Chocolate Cake with Vanilla Bean Buttercream and filled with Cranberry Compote, a perfect cake hit for the holidays!

A very happy new year to each and every one of you!


Candied Cranberry Compote

Ingredients:

Sugar- 790 grams
Water- 680 grams
Cranberries- 850 grams
Orange Juice- 100g
Cinnamon Stick- 1
Vanilla Bean- 1

Directions:

Combine 680g of the sugar and 340g of the water in a heavy bottom saucepan and bring to a simmer over medium high heat stirring until the sugar has dissolved.

Add the cranberries and poach until tender; do not allow the syrup to come to a boil. Remove from the heat and cool in the syrup.

Drain the cranberries (save the run off cranberry syrup for another use!) and spread them on a parchment lined sheet pan. Dry in a 200°F oven until they are slightly sticky, about 1 1/2 hours, set aside.

Combine 170 g of the candied cranberries with the orange juice, cinnamon stick, and vanilla bean in a sauce pan and simmer over medium heat until the mixture has thickened, about 15-20 minutes.

Remove the cinnamon stick and vanilla bean and purée the mixture. Gently stir in the remaining cranberries. Cover and store in the refrigerator.


Chocolate Cake

Ingredients:

2 cups sugar
1-3/4 cups all-purpose flour
3/4 cup unsweetened cocoa powder
1 tablespoon Black Cocoa**
2 teaspoons baking soda
1 teaspoon baking powder
1 teaspoon kosher salt
2 eggs
1 cup buttermilk
1 cup black coffee
1/2 cup vegetable oil
2 teaspoons vanilla extract

Directions:

Heat oven to 350°F. Butter and flour two 9-inch round baking pans. Set aside.

In the bowl of a stand mixer fitted with the whisk attachment or in a large bowl with an electric mixer, combine the sugar, flour, cocoa(s), baking soda, baking powder. Mix on low until dry ingredients are thoroughly combined. Mix together the eggs, buttermilk, coffee, oil and vanilla in a separate bowl then slowly incorporate them in to the dry ingredients. Beat on medium speed for about two minutes; the batter will be thin. Pour batter evenly into prepared pans.

Bake in preheated oven for about 35 minutes or until wooden toothpick inserted in center comes out clean. Cool 10 minutes; remove from pans to wire racks. Cool completely.

*Disclaimer- I do not own this recipe, it is from my collection of tried and true recipes, this recipe is coming to you from My Baking Addiction who adapted it from Hershey's Black Magic Cake.
**I have found this product at my local Sur la Table or I have bought it online via King Arthur Flour's website


Vanilla Bean Buttercream 

Ingredients:

1  1/4 cup sugar
5 large egg whites
2 cups (4 sticks) unsalted butter, cut into pieces
1 tablespoon vanilla bean paste

Directions:

Place whites and sugar in a heatproof bowl set over a pot of simmering water. Whisk until sugar dissolves and mixture is hot to the touch.

Transfer bowl to mixer stand. Using the whisk attachment, beat on high speed until mixture has cooled completely and formed stiff and glossy peaks, about 10 minutes.

Remove from heat, and pour mixture in to a stand mixer. Whisk on medium-high speed until the mixture has cooled and stiff, glossy peaks have formed. Reduce speed to medium, and add butter a few pieces at a time, whisking well after each addition. With mixer on low speed, add the vanilla paste and beat until smooth.


Assembly:

Rosemary sprigs- 4-5 for rosette cluster, 2-3 for single rosette
Cranberries- 15-20 for rosette cluster, 5-7 for single rosette

Level one cake layer and cut it in half horizontally, then repeat with the second layer. You will now have 4 total layers of cake. Place the first layer on a disposable cake round or cake plate. Heap about 1/3 of the reserved compote on to the cake layer and spread evenly- try not to let too much spill over the sides. Repeat with the remaining layers of cake. Reserve about a cup of frosting for the piping work on top of the cake. Frost the cake with the vanilla bean buttercream. I have made this cake for two occasions, both cakes are pictured above, one had a cluster of rosettes with rosemary sprigs and cranberries, the other time I did one larger rosette and the rosemary sprigs were simple with only a few cranberries off to the side, Decorate whichever way you prefer. If you need a good rosette tutorial, here is a great one to get you started!

fullsizeoutput_75ff.jpeg

what I want

Charin Kent November 17, 2017

I wanted the journey to end with the words “cancer free” but unfortunately it was only the beginning.

Now, I want off the roller coaster. I want to change my path, but there is no fork in the road, only walls on either side. I want to be done with this endless journey. I want to at least smell roses while I stroll. I smell only rotting thistles while they scratch and tear at my skin. 

I want to make my dreams come true. I effortlessly create them and watch as they blossom with radiant enthusiasm, beautifully imaginative, wild and free, fulfilling and blissful. Then they dry out, wither, decay, and rot instantaneously. I want my dreams not my nightmares. 

I want to type these words without my hands buzzing and going numb. I want to think without having to claw through vines of pain. I want to speak without stumbling and stuttering. I want this to be easy. I want an answer, just one answer. I want a door to open. I want a chapter to close. I want... I want... 

I want my wants, my plans, and my dreams to magically open a fork in the road. A door in the wall. A “The End” in my book of medical journeys.

It matters that I do not want this new-but-old body. It matters that I utterly loathe the road I am on. It matters that I will erupt if one more diagnosis is added to my laundry list of illnesses (7 to be exact). It matters, it is real, it is heartbreaking, but it does not take it away. I can explode, or implode, or blow, or pop, or flee, or fly, or scream, or sob, or rage, or run. I can and I have, but the list stands resolute. My wants indeed matter, but in the end, they make no difference at all. 

fullsizeoutput_7603.jpeg

I want to say I will still move forward. I want to say I will push myself even though I am down. I want to say I will fight with whatever little strength I have. 

But the truth is, I am so very tired of moving, pushing, and fighting. 

Sometimes I choose to move forward and fight, and sometimes I raise a white flag. But, I don’t like talking about those white-flag days because they are complicated. Until very recently I thought that white flag was a horrible sign of defeat, and if I let myself sink into despair (which I have) it honestly can be, but it doesn’t have to be. Raising the flag is still a movement, not forward, or back, or up, but down. It is sitting and accepting the sadness, the exhaustion, the pain, the hurt, and the unstoppable change that is happening to me. It’s mourning, it’s crying out, it’s resting, but it is not defeat. Because, while I rest, I dream of a better day, a day when my heart is healed enough from the pain and exhaustion that I have strength to stand up and take a step forward. 

Now I want you, my friends, to know that sometimes the journey doesn’t end when the crisis is over, when the cancer is defeated, when the storm subsides, when the news fades. I don’t want you to know it just for my sake, but for that friend of yours who lost a loved one last year, or that relative who had surgery a few months ago, or a close friend that you know was going through a very tough time a while back and you haven’t heard from in a while. The journey may seem over, and maybe it is over, but for so many, it only began with that crisis and the journey of healing may take a lifetime. Check in on them even months after the get well casserole is eaten, or the gofundme money sent, or the sympathy card mailed. If they are like me, they may have a smile plastered on their face just to keep their sanity in place, but inside they are trying to fight, or push, or move forward, but it can be unspeakably exhausting and they may need rest and a friend like you. Tell them you are still there and you still care for them, and let them take the lead. 

IMG_5152.JPG
fullsizeoutput_75d1.jpeg

As of late my health issues have, unfortunately, been increasing, which I am sure you could piece  together from the above ;) The issues that have cropped up range from carpel tunnel in both of my hands to severe brain fog to muscle spasms and cramps, and all sorts of fun stuff in between. Most are due to having hypoparathyroidism, others are from not having a thyroid, others are a combination of the 2 at war with one another, and quite frankly others my doctors and I don't know where it's coming from yet. I really have no idea if there will be a "better tomorrow" or cure for me, but I am learning to very slowly take each day with a tiny baby step in the right direction and be proud of small accomplishments. What that means right now is many doctors visits, self care, and caring for my family. No matter what challenges I am facing right now I am and always will be so deeply grateful that I was able to kick cancer's butt, and given the choice I would definitely do it all again even though this horrible journey began as a very rare and unfortunate result of the cure.  

One "baby step" and act of self care I have started is "clean eating" consistently and I have found that my body is actually a lot happier when eating hearty and whole foods. To be clear, dieting is not my thing like... AT ALL, lol, but I am at an awkward point where I realize that having some sort of eating regimen is really the only viable long term option I have to keep my body healthy. Why I like this style of eating more than others is because it does allow for some flexibility in regards to baked goods. For example... this whole wheat sandwich bread! I found the recipe from this lovely blog, adapted it a teensy bit to fit my own personal preferences, and have been trying to make it weekly for my family of sandwich and toast eaters. I hope you enjoy this recipe and please remember to reach out this week to someone you know who is on a difficult journey, a simple gesture of care can give more hope than you know!


Whole Wheat Sandwich Bread

Ingredients

6 cups whole wheat flour
2 1/2 cups warm water (between 105-110 degrees)
1 1/2 tbsp instant active dry yeast
1/3 cup honey
1/3 cup sunflower oil
2 1/2 tsp. salt
 

Directions

Grease 2 loaf pans with sunflower oil and set aside.

Combine water, yeast, and 2 cups of the flour in the mixing bowl of a stand mixer. Set aside to sponge for 15-20 minutes, until risen and bubbly (warmer weather takes 15 min, cooler temps usually needs 20).

Add honey, oil, salt, and 4 cups of flour. Mix with a paddle attachment until dough starts to clean sides of bowl. Change to dough hook (or turn out to knead by hand), and knead 6 to 7 minutes (10 by hand).

Form into two loaves and place into prepared loaf pans. Allow to rise in a warm place for about 60 minutes, or 15-30 min. longer if needed to reach 1/2 to 1-inch above pans (i.e., cold kitchens may need the longer time). Preheat oven to 350 degrees ten minutes before rising time is done.

Bake for 30 minutes, rotating halfway through if needed.

Immediately remove from pans to cool on a rack. Allow to completely cool before slicing.

this does not define me

Charin Kent July 28, 2017

WARNING! THIS BLOG POST CONTAINS MAJOR SPOILERS FOR THE MOVIE MOANA. READ ONLY IF YOU DON'T MIND KNOWING, OR ALREADY KNOW, THE ENDING!

I have crossed the horizon to find you
I know your name
They have stolen the heart from inside you
But this does not define you
This is not who you are
You know who you are

The first time I saw the movie Moana with my then 5 year old daughter I found myself breaking down full fledge ugly sobbing during this very short song that culminates in a stunning ending to the movie. I didn’t know why I was bawling at the time, all I knew was that there was something deep inside me that wanted to come out with that song and that scene. I knew that a part of me was emoting right alongside the ferociously angry volcano monster she-demon, Te Ka, that transforms in to the garden of eden life giving goddess, Te Fiti when her heart, a magical stone, is given back to her.  

After about the 7th time watching this movie with my daughter, and son (who loves it now more than my daughter does) I began to realize what deep seeded flower of a thought was trying to emerge. It’s the line, “This is not who you are, you know who you are.” that sends fire to my eyes every time I hear it. In its own way, this transformation from ferocious fire demon to captivating goddess is how I feel when battling depression, anxiety, and if I am being completely frank, even my own struggle with motherhood. Depression, anxiety, and irritability, and all the feelings of hopelessness, anger, and fear that the former give way to are very real monsters I have unfortunately become all too well acquainted with. When the day comes that one of these fiery monsters rears its head, when I feel like a dirty pile of ash and sulfur and I don’t want to get out of bed, when I feel as though my head will explode and my body erupt if my son throws a tantrum (his 4th one of the afternoon), when I can’t seem to stop the burning simmering voice in my mind that boils up to the surface every mistake I have ever made in my life, it certainly feels as though my passion, my joy, my heart is stolen from me.

But this does not define me.

I know it is “just a kids movie” but there is something deeply compelling about this scene that should not be dismissed. After boldly and heroically attempting to defeat the she demon volcano monster, Moana realizes that the monster is indeed the island of life itself, Te Fiti, the island that, once restored, would bring life and peace to herself and her home. She also realizes that the only thing that would change this monster was to place the heart back where it belonged, and in order to do this she would first need to remind it of who it really is, and who it really is not. In the chillingly climactic moment that follows Moana calmly, bravely, and resolutely walks towards the monster who charges at her with wrathful vengeance and she sings this song that stops Te Ka short with shock. They place their foreheads together in a sign of understanding, sisterhood, and quite honestly I think grace for one another. Whereas this scene is quite short in the movie, I think in my case a much more accurate portrayal would be if this moment lasted hours, days or even weeks. And for me, the voice of Moana singing calmly, bravely, and gracefully is sometimes that of my own, sometimes that of my husband’s, sometimes my daughter’s, sometimes a friend’s, and many times it is God’s. These are the voices of my heroes and heroines, encouraging me and reminding me that no matter how volcanic my eruption of despair may be, this does not define me, I know who I am. I am wonderfully made. 

It is a gracefully messy life to live like this, both in eruptive volcanic ash as well as humming a resolute tune of grace. It is a life that many lead, whether it is simmering on the inside and only violently explodes once every century, or if you see the boiling pot every day. I do know one thing, that gracefully strong song is worth singing.

The first 90 seconds of this video is the scene I reference from the movie Moana. If you have not seen the movie I urge you to watch the whole thing (it's on Netflix!), I don't think you'll regret it! 

fullsizeoutput_6ff6.jpeg
fullsizeoutput_6ff8.jpeg
fullsizeoutput_6ffb.jpeg
fullsizeoutput_700b.jpeg

When I sat down to write a blog post (the first one in about 2 months I may add, thanks to settling in to a new home and new routines) I had no intention of writing the above. I had intended to write about our new home and the new beginning it has brought as well as all the trial, error, and bliss that has come with it. Alas, this quirkily emotional post is what spewed out of me almost immediately and I simply went with it. A post on new beginnings, complete with a recipe for Whole Wheat bread, will just have to wait until next time. After I wrote this post I decided to let the impromptu inspiration have its full effect and contemplated what a Moana inspired cake would taste like. Coconuts and bananas are the primary food elements from the movie that came to mind (besides fish... and I don't think I am talented enough to make a tasty fish cake). I have always loved coconut, and particularly coconut dacquoise, a thin layer cake made primarily of desiccated coconut and whipped egg whites and is baked very quickly in the oven. I wanted to do a banana filling and thought I'd try my hand at a banana curd. If you are unfamiliar with curd I am sure this sounds pretty unappetizing but I promise you, it is delicious! Creamy and perfectly banana-y the curd really adds more tropical notes to the cake. However, Banana and Coconut by itself felt a bit plain for my liking, I wanted more of a tropical pow and tang to it so I decided to brush the dacqouise layers in sweetened lime juice and let the cake sit overnight for the flavors to meld together and the lime to soak in to the cake. Finally for the frosting, I instantly thought of doing this swiss meringue type "cloud" frosting as I knew it would give the cake the final wave effect I was going for. I wanted to round out the flavors a bit and add some kind of floral aroma to the cake so thus I added vanilla and a bit of rose flower water to the frosting. Add some eucalyptus sprigs and day lilies from trader joe's and I had the exact Moana inspired cake I was hoping for! The recipes that follow are for experienced bakers to be frank... I am a very good baker but getting dacquoise down is quite tricky. If this is up your ally, it makes for an amazing summer-y cake that will transport you to sunshine and sandy beaches in just one bite. Enjoy!

Coconut Dacquoise

Ingredients:

45g almond flour

70g cake flour

355g powdered sugar

pinch of salt

285g desiccated coconut

425g egg whites

140g granulated sugar


Directions:

Line two sheet pans with parchment paper.

Sift together the flours, powdered sugar, and salt. Whisk in the coconut. 

Whip the egg whites with the whip attachment on medium speed until frothy. Gradually add the granulated sugar while continuing to whisk, then whip on high speed until medium peaks form. 

Gently fold in the dry ingredients into the beaten egg whites in about 3-4 additions. 

Spread the batter evenly into the prepared sheet pans. Bake in a 350°F convection oven until the cake springs back when touched, about 10 to 12 minutes. 

Cool completely and store, covered, until needed.


banana curd

Ingredients:

3-4 bananas/230g pureed and strained

110g water

3 silver leaf gelatin sheets

280g sugar

230g eggs

230g butter, softened and cubed


Directions:

Purée the bananas in a food processor and then strain the puree through a fine mesh sieve. Measure out 230g of pureed and strained banana and set aside.

Bloom the gelatin in the water. Squeeze out excess water and set aside. 

Whisk together the purée, sugar, and eggs. Add the butter and place the mixture in a glass bowl over barely simmering water. Cook the mixture stirring it every 3 to 5 minutes until it is thickened and approximately 165°F. 

Remove the pot from the heat and blend in the gelatin. Strain the mixture through a fine mesh sieve. 

Pour the curd into a large shallow nonreactive pan (I use a sheet pan) and cover with plastic wrap placed directly on the surface of the curd and cool in the refrigerator. Store the curd, covered, until ready to fill the cakes.


Vanilla Rose Cloud Frosting

Ingredients:

6 large egg whites

 2 1/2 cups sugar

1/2 cup water

1/2 tsp cream of tartar

2 tsp pure vanilla extract

1 tsp rose water


Directions

 Place egg whites, sugar, water, and cream of tartar in a heatproof bowl set over a pot of simmering water. Whisk until sugar has dissolved and egg whites are hot to the touch. Test by rubbing the mixture between your fingers; it should feel hot and completely smooth.

Remove from heat, and pour mixture in to a stand mixer bowl. Using the whisk attachment, beat on high speed until mixture has cooled and formed stiff and glossy peaks, then add the vanilla and rose water and whisk in slowly to combine. Use immediately.


Assembly

1 cup sweetened lime juice

To get the look shown above, place about 2 cups of frosting in to a bowl and tint it (I prefer Americolor gel food coloring) to the darkest shade of color desired for the bottom ombre layer. Take about 1/2 a cup of this tinted frosting and combine with 1 1/2 cups white frosting. Once combined then take 1/2 a cup of this lighter frosting and combine with 1 cup white frosting, you will now have 3 shades of your desired color, and you should have enough white frosting to cover the top. Fit 3 piping bags, one with a 12mm french piping tip, another fitted with an 11mm french piping tip, and the last fitted with a 10mm french tip. Fill each fitted piping bag about 2/3 full with the tinted frosting, each bag will have one shade of color. Cut the dacquoise to make even layers, make sure to measure them to ensure precise layers are created, I was able to make 4 layers from each sheet pan of dacquoise. Place one layer of dacquoise on a cake plate or disposable cake board. Brush the layer liberally with sweetened lime juice then fill with the prepared curd. Repeat this step with the remaining layers of dacquoise. Crumb coat the cake with white frosting. Pipe using the wave or rosette technique on the sides of the cake, starting with the darkest shade as the first layer, then using the next lightest shade and so on until the sides are covered. Place about 1-1/2 cups of white frosting on the top of the cake and smooth it out. using your offset spatula make peaks by tapping lightly on the top and lifting up the frosting to form peaks.

strength

Charin Kent June 1, 2017

I'm going to speak candidly here. When I first saw this t-shirt I simultaneously sneered, chortled, and rolled my eyes. STRONG... Seriously?! What kind of a cruel joke is this? How could anyone who knows the depth of this disease put the word "strong" in the same sentence as hypopara, let alone make it the tag line for hypoparathyroidism day? Some days Hypopara robs me of the strength to simply lift one of my children up when they need comforted or cuddled. It weakens my hands and arms so that prolonged handwriting, baking, painting, coloring, typing, reading a book (basically anything that I love to do with my spare time besides binging on Netflix) are now accompanied by an excruciating numbness, tingling, and pain. There are many times when I find myself stuttering over and over again, trying to speak aloud a simple word or sentence like "could you feed the cat" to my husband, but all of a sudden it will not come to mind, because this horrible disease rears its ugly head and yanks away any strength of mind I ever had. And don't even get me started on the teeny tiny amount of exercise I dared to think possible so that I could gain some semblance of health... Every attempt has left me with a pain that torments my muscles and goes down deep to my bones the next 2-3 days afterward. I constantly, day in, and day out, feel as though I am losing a never ending battle with a horrific Calcium sucking monster that eats every ounce of strength my body would dare to procure. I have sincerely never felt more helpless, weak, and defeated in my entire life. 

Yet as I pondered on this word more and more I realized there is another kind of strength I am learning about through this ball and chain of a disease, but it digs much deeper than the physical aspect I have always associated with that word. You see the fact is, I am still here, stubbornly staring in the face of the monster every day shouting, "I am not done, take what you will today, but you do not own me!" That in and of itself takes strength. It takes strength to have patience with my defective body too. It takes strength to lay my pride down and ask for help when I need it. It also takes strength to accept my weaknesses that I simply cannot change today. It takes strength to choose to still enjoy life's many gifts that I CAN enjoy instead of let myself drown in bitterness at the unfairness of this disease. It takes strength to discipline myself to care for my body as it is. And it certainly takes heaps of strength to hope that tomorrow could be a better day. So in truth, I don this shirt today inwardly smirking at the irony of it, but simultaneously embracing this word that feels foreign on my tongue, but soothing to my soul. Though we often feel helplessly weak, those who suffer from hypoparathyroidism ARE strong. 

Unfortunately baking has not been in the cards much for me lately what with juggling two rambunctious kiddos, two moves within 3 months, buying a house, selling a house, oh and yeah this crazy disease I mentioned. So the recipe that follows is from a few weeks back when I wrote a post in honor of my daughters teachers. I posted the recipe for Raspberry Lemon cupcakes, and now here is the recipe for the Blueberry Vanilla ones. I hope you enjoy and finally, if you would like more information on hypoparathyroidism and how you can help please go to- www.hypopara.org.

fullsizeoutput_6d6f.jpeg

Vanilla Bean cupcakes

Ingredients

1 cup (2 sticks) unsalted butter, room temperature, plus more for pans        
2 1/2 cups all-purpose flour (spooned and leveled), plus more for pans        
1/2 teaspoon baking powder
1/2 teaspoon baking soda
1 teaspoon salt
1 ½ cups sugar
2 large eggs plus 3 large egg yolks
1 tbsp vanilla bean paste or one scraped vanilla bean
1 cup low-fat buttermilk

Directions

Preheat oven to 350 degrees. Line 2 muffin pans with cupcake wrappers. 

In a medium bowl, whisk flour, baking powder, baking soda, and salt.

In a large bowl, using an electric mixer, beat butter and sugar until light and fluffy. Mix the eggs, yolks, and vanilla paste in a small bowl. With mixer on low, beat in the egg mixture, slowly in 4-5 additions. Alternately beat in flour mixture and buttermilk beginning and ending with flour mixture; mix just until combined.

Using an ice cream scoop to ensure even and precise measurement, fill each cupcake liner 3/4 of the way full with batter and smooth the tops once all liners filled. Bake until cupcakes are just barely golden brown on the sides and a toothpick inserted comes out clean. Remove from pans and let cool completely on wire baking racks before piping the buttercream on to them. 

Blueberry buttercream

Ingredients:

4 large egg whites, room temperature
1 1/4 cups sugar
3/4 pound (3 sticks) unsalted butter, softened and cut in to cubes
2 pints blueberries

Directions:

Place the blueberries into a food processor and blend until they are a smooth puree.

Place the egg whites and sugar in a heatproof bowl set over a pot of simmering water. Whisk until sugar dissolves and mixture registers 160 degrees on a candy thermometer.

Remove from heat, and pour mixture in to a stand mixer. 

Whisk on medium-high speed until the mixture has cooled and stiff, glossy peaks have formed. Reduce speed to medium, and add butter, 1 piece at a time, whisking well after each addition

With mixer on low, slowly add the blueberry puree, about a 1/4-1/2 cup at a time, mixing thoroughly with each addition.

Assembly

Fit a piping bag with a 10 mm star, or french, piping tip and fill the piping bag with buttercream. Pipe a rosette on to each cupcake large enough that the buttercream covers the entire cupcake. Enjoy in the summertime amongst friends and/or family while sipping iced tea… or enjoy them how and whenever you choose, these beauties are delicious really any time of year!

Tags hypoparathyroidism, hypopara, hypoparathyroidismawarenessday, hypoparastrong, hypoparaworldday2017

abounding in strength, courage, and wisdom

Charin Kent May 9, 2017

She handed me the papers neatly assembled and stuck together by a staple. Each paper was filled with throughly detailed educational milestones listed to the left, and how Lily was progressing with each milestone was marked to the right. I was pleased to see the progression that had occurred throughout the year, a progression that I knew full well had almost nothing to do with how much I have educated my daughter at home (because if I am honest “milk and cookies and play time” is the most exotic our extracurricular activities get these days when she is at home) and almost everything to do with the two lovely ladies sitting across from me. 

These ladies sat patiently on two tiny worn wooden preschool chairs, the same type I was seated in too. Whilst I squirmed around to try and get some amount of my behind comfortable for the ten minutes that comprised my parent teacher meeting, I realized they had been sitting in these mini chairs for hours and were most likely sore to the bone because of it. That's when I turned my attention back to what she was saying, as I probably should have been doing all along instead of fidgeting distractedly like a 5 year old. 

"She really is doing wonderfully, she is getting better at putting consonant sounds together and reading them aloud, she has become very well versed in the number boards and has been a great supportive and fun friend to everyone. I really think she is right where we want our kids to be at for going into the El1 class next year." Then it hit me... I had prepared myself for the heartache that would come with seeing my baby girl transition to a new classroom next year but I hadn't prepared myself for saying goodbye to the two familiar faces in front of me that had impacted not only my daughters life for the past 3 years, but also in turn my own. 

Lily's teacher had taught Lily from 8:30a-3:30p day in and day out for the past 3 years, her assistant teacher had seen her through the past two. My brain flashed with each happy and tragic event that our little family had endured in these three years. The addition of a spunky little boy that made Lily a big sister and who was now running circles around my husband, about to rain destruction on this tidy and perfectly organized Montessori classroom. My unexpected diagnosis of cancer only a few short months after Lily’s brother joined our family. The thyroid surgery that left me with a scar on my neck and a chronic illness that was at the moment making my legs go tingly and numb in said tiny chair. A round of radiation treatment that rid my body of the cancer that had plagued it. Countless bouts of sickness, hospital visits, and visiting relatives helping with each new life event. And now our family is in the middle of a topsy turvy move that has sent our little world of home into disarray, disorder, and confusion. 

I realized that they had been walking alongside my daughter for the most tired, most joyful, most painful, most traumatic, most tumultuous, most upheaval filled years I had known. Yet through it all, they had been a constant to her. A constant source of love, a constant source of knowledge, a constant source of joy, a constant source of constance in the midst of a chaotic life. I hadn’t stepped back to see the gigantic gorgeous picture of heartfelt care and careful guidance my sweet girl had been blessed with every day. 

And Lily’s story, my story, our family’s story was only one of the 26 stories these remarkable women saw and walked alongside of every day. What diligent strength, what courage of heart, what wealth of wisdom these ladies possess to be able to be a source of constance to their students who walked in to school every day from all different paths of life. 

That is a wonderful teacher for you. They walk alongside students right where they are at in their story and they encourage them to progress, to grow, to sharpen their skills and to never stop learning, even if there is a storm of chaos when they get home. I will never forget those faces and the peace they brought to me and to my daughter during these past years.

Today is teacher appreciation day and so I take this moment to speak up and say bravo to these courageous teachers, these leaders and cultivators. I see you. I see the never stopping, back breaking, heart overflowing, hope ever abounding, always challenging work that flows out of you every school day. I see you, I appreciate you, and I will always support you.

My son's class celebrated Teachers Appreciation week last week so my daughter and I whipped up some fresh berry cupcakes for his teachers as well as a batch for her teachers. The recipe that follows is for the raspberry lemonade ones pictured, I'll save the recipe for the blueberry vanilla cupcakes (also pictured) for a future post. Enjoy and don't forget to reach out to a teacher you appreciate this week and let them know how they have impacted you and/or your children's lives!

fullsizeoutput_6d75.jpeg
fullsizeoutput_6d73.jpeg
fullsizeoutput_6d77.jpeg

Lemon Cupcakes

Ingredients

1 cup (2 sticks) unsalted butter, room temperature, plus more for pans        
2 1/2 cups all-purpose flour (spooned and leveled), plus more for pans        
1/2 teaspoon baking powder
1/2 teaspoon baking soda
1 teaspoon salt
2 tablespoons lemon zest
1 ½ cups sugar
2 large eggs plus 3 large egg yolks
¼ cup fresh lemon juice
1 cup low-fat buttermilk

Directions

Preheat oven to 350 degrees. Line 2 muffin pans with cupcake wrappers. 

In a medium bowl, whisk flour, baking powder, baking soda, salt, and lemon zest.

In a large bowl, using an electric mixer, beat butter and sugar until light and fluffy. With mixer on low, beat in eggs and yolks, one at a time. Beat in lemon juice. Alternately beat in flour mixture and buttermilk beginning and ending with flour mixture; mix just until combined.

Using an ice cream scoop to ensure even and precise measurement, fill each cupcake liner 3/4 of the way full with batter and smooth the tops once all liners filled. Bake until cupcakes are just barely golden brown on the sides and a toothpick inserted comes out clean. Remove from pans and let cool completely on wire baking racks before piping the buttercream on to them. 

Raspberry Buttercream

Ingredients:

4 large egg whites, room temperature
1 1/4 cups sugar
3/4 pound (3 sticks) unsalted butter, softened and cut in to cubes
2 pints raspberries

Directions:

Place the raspberries in to a food processor and blend until they are a smooth puree. Strain the puree through a mesh strainer until you have about 1- 1 1/2 cups completely smooth puree.

Place whites and sugar in a heatproof bowl set over a pot of simmering water. Whisk until sugar dissolves and mixture registers 160 degrees on a candy thermometer.

Remove from heat, and pour mixture in to a stand mixer. 

Whisk on medium-high speed until the mixture has cooled and stiff, glossy peaks have formed. Reduce speed to medium, and add butter, 1 piece at a time, whisking well after each addition

With mixer on low, slowly add the raspberry puree, about a 1/4-1/2 cup at a time, mixing thoroughly with each addition.

Assembly

Fit a piping bag with a 10 mm star, or french, piping tip and fill the piping bag with buttercream. Pipe a rosette on to each cupcake large enough that the buttercream covers the entire cupcake. Enjoy in the summertime amongst friends and/or family while sipping iced tea… or enjoy them how and whenever you choose, these beauties are delicious really any time of year!

A quick snap shot I took and posted to Instagram before delivering these lovelies :)

A quick snap shot I took and posted to Instagram before delivering these lovelies :)

open the box

Charin Kent April 1, 2017

The last several weeks I have found myself surrounded by boxes, packing tape, and sharpies as we have moved from our single family home in Lincoln Park to an apartment in Bucktown (two neighborhoods in Chicago). Working day in and out with packing materials got me thinking pretty heavily about a concept I’ve struggled with throughout my 31 years of life. I hate being labeled or "put in a box," as I truly believe I don't completely fit in one.

I’ve always been an odd ball. There are days when I honestly feel that the word misunderstood is my middle (if not first) name. I don't mean that in the moody rebellious emo kid way... I am simply full of odd quirks that don't fit into ANY current cultural box. I craft cakes but I'm not a cake decorator. I'm non confrontational and comfortable with nuance and gray areas, yet unwavering in my deep convictions and beliefs. I am neither a republican nor democrat as I can't fully agree with either party and yet I still vote. I am a nomad "gypsy" at heart, but have chosen and feel called to devote myself to one city long term. I am a Christian but wouldn't call myself "religious" because my faith is founded on a relationship with God not a set of moral codes, traditions, and/or rules I follow. When I look up the definition of "millennial" on Wikipedia, I see that technically I am one since I was born in the mid 80’s, and yet I sincerely cannot identify with the majority of their defining characteristics. I am wholeheartedly an introvert, but I also LOVE hosting parties, both big and small. I was born in Washington, grew up in California, lived out all my teen years in Mexico, then bounced back to Washington, and have now lived in Chicago for 8 years. If you were to ask me where I’m from I’d say California. Why? Honestly, simply because it feels like home when I am there.

Any one of these different parts of my story, my thoughts, or my beliefs could be put in its proper box, slapped with packing tape, and labeled with a sharpie. However, you can't fit all of who I am, have ever been, and what has made me, ME into a nicely packed box with a neat and tidy label. Boxing and labeling may be an efficient method of understanding, but it can never explain me as a whole. I deeply crave to be understood and to understand those around me. I am not naive, I know I will never be fully understood by everyone nor will I fully understand others. What I long for is to be seen as an open box. Others are free to look around and ask what's in there. I'm happy to tell them about my story, my life, my thoughts, my beliefs, and they're more than welcome to "take notes.” It's that final step of taping, labeling, and storing that turns me into an object of efficiency rather than a uniquely made human.

I want to treat others like that too, because I'd be lying through my teeth if I said that I NEVER label and heartlessly pack someone away due to a single interaction, post, or observation. I am learning to openly observe rather than quickly tape shut, and I am already noticing the loving benefits it brings. Join me, friends. I know I'm not alone in this. However little or much you can tend to pack people away, take a second to open that box and give the contents a closer look. You may be surprised at what is in there, or maybe you won’t be surprised by what's in there at all. To me, it's worth a shot if compassion, understanding, grace, healing, patience, restoration, peace, and joy could spill out of us.

IMG_3816.JPG
fullsizeoutput_6c80.jpeg
fullsizeoutput_6c82.jpeg

I have kept up with my goal that I discussed in my last post about learning new techniques and perfecting my craft (right now I am focusing on the world of cookies). I have been pleasantly surprised with myself and how with a little patience I have been able to recall and perfect some techniques I thought would take months to get the hang of again (cough, rolling out cookie dough, cough). These could quite possibly be the cookie version of myself. Bright, sunny, and slightly whimsical on the outside, tranquil, dark, and complex on the inside. I recommend making them and refrigerating before you eat them as the filling tastes best cold and has a tendency to spill all over your face and shirt and maybe even pants if it is at room temp. I may know this from unfortunate personal experience ;) I absolutely LOVE these cookies and I hope you do too!


Citrus Shortbread and Lavender Chocolate Ganache Sandwich Cookie

Citrus Shortbread

Ingredients:

600g/1 lb 5 oz Cake flour
9g/1 1/2 tsp Salt
230g/8oz Sugar
450g/1 lb Butter, softened
Zest of 3 navel oranges
1 Vanilla Bean

Directions:

Line sheet pans with parchment paper or nonstick baking mats. 

Zest the oranges and add zest to butter in the bowl of a stand mixer fitted with a paddle attachment. Split the vanilla bean, scrape out the seeds and add them to the butter and zest. Beat the butter mixture for about 1-2 minutes, until the zest and vanilla are thoroughly incorporated in to the butter.

Sift the flour, salt, and sugar together over the butter mixture. Beat slowly, just until fully incorporated. 

Divide dough in to 4 equal parts. Wrap and then refrigerate each piece of dough until it is firm enough to roll (at least 1 hour).

Roll out the dough on to a lightly floured surface to 1/4" think. Cut in to your desired shape using a cookie cutter of your choosing and transfer the cut dough to a prepared sheet pan. Collect the scraps of dough, keeping them flat and layering them to prevent overworking, wrap and refrigerate the scraps if needed before re-roling and cutting in to additional cookies. Repeat this process with the remaining 3 pieces of dough. Chill the cut cookies for 30 minutes.

Bake at 350ºF until lightly browned, about 10-12 minutes. Transfer to wire racks to cool. Be sure to cool these cookies completely before filling them.

Lavender Chocolate Ganache filling

Ingredients:

15 ounces bitter or semi sweet chocolate, chopped
1 1/4 cup heavy cream
6 tbsp unsalted butter, softened
2 tbsp dried lavender

Directions:

Place the lavender with the heavy cream in a medium saucepan and bring to a simmer on medium heat. Pour the mixture in to a heat proof bowl and place saran wrap on top of the mixture so that it directly covers the surface. (This is to avoid a skin forming on the top) Let cool to room temperature.

With a tea strainer, strain the cream in to a liquid measuring cup, pressing the final amount of cream out of the lavender at the end. The amount left over after straining should be 1 cup.

Melt the chocolate with the infused cream in a heatproof bowl over simmering water. Add the butter and whisk until smooth. Take off heat and let cool to room temperature, then refrigerate, whisk occasionally, for 15 minutes, or until the consistency has thickened and is to piping consistency. Immediately move to the next step of assembling the cookies.

Assembly:

Fit a 10 mm star, or French piping tip in to a piping bag. As soon as ganache filling is ready fill your piping bag 2/3 full with the filling. Pipe in a circle to fill one shortbread cookie starting from the outside and spiraling in to the middle so that the cookie is completely covered with ganache filling. Top with an unfilled shortbread cookie. Repeat with the rest of the cookies and filling. Cool in a fridge for at least 1 hour before serving. These cookies should stay cool until being served.

goals, grace, and cookies

Charin Kent January 24, 2017

"Can I write the numbers in the boxes?!" Lily asked eagerly.

"Sure honey, I'll show you where to put each order in and then we'll add it all up and see how close you are to your goal." I said.

We take out the giant Girl Scout order form, with it's neat tiny rows of squares to check off and tally each box of precious cookies sold. 

I clearly print the name of our "customer" and then hesitantly give her the pen and say, "Ok now Lily, NO, NO, NO, don't write anything on the paper yet, you have to wait until I tell you which box to write in and the number to write in the box which shows how many boxes our customer ordered. Ok, yes just leave the pen down and be patient. Now, Clarence Love wants 2 boxes of Tagalongs,"

"2 boxes of tagalongs, OK! Tagalongs, tagalongs, tagalongs..." She screws her face up in concentration trying to read the cookie names that are cutely color coded and perfectly pictured so she can fill in the corresponding color coded box in it's neat tiny little row. "Ta, Ta, TA! That's this one it starts with a T!" 

"Uh, no Lily... that's Thin Mints." I reply with an impatient sigh.

"Oh. Well let's see here, Ta, T, Taaaaaa... HERE WE GO! It's this one!"

"Noooo. That's Toffee Tastic, keep looking, try and sound it all the way out." I say out loud while in my head I chant, "Don't give her the answer, she needs to figure it out by herself, don't give her the answer, she needs to figure it out by herself." Over and over again to ebb my frustration that my lofty goal for her to read, or at least sound words out, has not been perfectly achieved by this point in her (kindergarten) education. 

"There it is!! It's Orange, so I put a 1 in the orange box."

"Nope, remember how many I said she ordered?"

"3?"

"No... 2, Lily, put a 2 in the box."

"Oh, Ok mama!" She said and messily wrote a backwards 2 in that precious tiny box whilst I continued with the chant in my head.

This same ebb and flow of misplaced reading, backwards letters, and forgetfulness went on and on for another 10 minutes all with the background noise of my toddler son fighting for my attention by grabbing random crap around the house and yelling "Ma! Maaaaa! Eeee!" My irritation level would rise and then recede as I would try some calming breaths but, unfortunately, I finally lost control and let my frustration peak.

"No Lily, That's not how you write 30!" I said harshly. 

Lily looked down in complete defeat, got down from her chair and said, "I'm sorry mama, I'm not good at this. I shouldn't do this anymore, you write down the numbers." Then she walked away with tiny tears in her eyes. 

Uh oh... major mom fail. Just writing out this interaction makes me quite horrified with myself. This is not the parent I want to be but when I am sick, tired, angry, worried, frustrated, scared this is the inevitable mother that comes out. I treat my daughter how I treat myself, with a lack of grace and an abundance of impatience. So often if my work is not perfect after a few attempts I tend to get more and more frustrated until I do exactly what my sweet 5 year old daughter just did- crumble and walk away defeated saying, "I'm just not good at this, I shouldn't even try." My young adulthood was shackled to this thought process and I let myself become a dying shell of a person because of it. Luckily, I was encouraged and supported by my husband (my best friend) to break free, hold onto my determination, and make what I loved to do stick until I was an expert at it, and I did. I chose to move forward instead of stay in a continuous circle of doubt. I want to be that encouraging and supporting voice to my child, myself, and yes even you reading- my friends.

I took Lily by the hand, apologized, encouraged her, and we both tried again, wiping away the mistakes and moving forward with becoming experts at something we loved to do.

fullsizeoutput_69f5.jpeg
fullsizeoutput_69f8.jpeg
fullsizeoutput_69f9.jpeg

When I was 23, I was ready to move on to becoming an expert at something I love to do, first cake decorating, then more specifically what I like to call, cakery, which is now my beloved expertise. However I can feel the niche baking knowledge I gained whilst attending The French Pastry School 7 years ago being sapped away with age and now illness. I do not want those factors to shackle me, so I asked for (and received) a gigantic baking and pastry text book written by The Culinary Institute of America for Christmas. I plan on diving into it this year as well as several other advanced pastry books. I am eager to pick myself up and fight to become an even more exceptionally knowledgeable baker than I already am. I created a FaceBook page so I can quickly capture my creations and share them. Like the page for updates on the blog or to occasionally see some yummy treats, first stop will be relearning the art of cookies!

fullsizeoutput_6a07.jpeg
fullsizeoutput_6a00.jpeg

Speaking of cookies... here I will leave you with a simple and delicious recipe adapted from the above book. The cookie came out a perfect combination of crunchy on the outside, soft in the inside, absolutely delicious! This book, along with most advanced baking books, uses grams and ounces to measure their ingredients. I highly recommend acquiring a basic scale if you want to up your pastry game, it definitely makes a difference in accurately measuring ingredients and creating a quality baked good. Make, share, enjoy and remember the importance of grace towards others when you munch on them.


Chocolate Chunk Cranberry Cookies

Ingredients:

600 g/1 lb 5 oz all purpose flour
7 g/ 1 1/4 tsp salt
7 g/1 1/4 tsp baking soda
400g/10 oz unsalted butter, softened
10 oz/280 g granulated sugar
6 1/2 oz/180 g brown sugar
3 eggs
1 tsp vanilla
350g dark chocolate chunks
350g dried cranberries

Directions:

Preheat the oven to 375°F. Line 2 baking sheets with parchment paper.

In a medium bowl, sift and whisk together the flour, salt, and baking soda and set aside.

In the bowl of an electric mixer fitted with the paddle attachment, beat the butter and sugars together on medium speed, scraping down the sides occasionally until the mixture is light and fluffy, about 5 minutes. Combine the eggs and vanilla. Add to the butter-sugar mixture in three additions, mixing until fully incorporated after each addition.  On low speed, add the flour mixture and mix until incorporated. Add the chocolate and cranberries and mix in by hand. 

Using a spring release cookie scoop form the dough in to balls and place on prepared pans. 

Bake the cookies for 15 minutes until they are golden brown on top. Remove them from the oven and place the baking sheet on a cooling rack for five minutes. Use a spatula to transfer the cookies to the rack to cool completely. Store the cookies in an airtight container as soon as they are cooled.

fullsizeoutput_6a09.jpeg
fullsizeoutput_6a0f.jpeg

the beautiful scar

Charin Kent January 1, 2017

A year ago today I sat in anxious anticipation to leap past the sterile word that had forced itself on to my 30 year old body: thyroidectomy. I sat in the hope that I was safe in that 80% chance of not having cancer. I sat in an exhaustion unlike any I had ever experienced as I had just endured an 18 hour drive through the night with my then 4 year old and 7 month old, both of whom were outrageously sick and horrifically cranky. I sat stunned to silence by a thousand uncontrollable fears. I sat consumed by an endless combination of unknown outcomes and possibilities. I sat loathing every inch of my body, with all it's unknown territory and the unforgivable twists and turns it had revealed to me in just 9 short weeks. I sat thinking that if I could just hurdle past this awful procedure, my life would return to normal once more. A year ago today I was sitting at the worst point of my life to that date and thus thought it would only get better from that point forward. 

Then I leapt, and a tale of cancer met me on the other side. I leapt again, and a lifelong enemy called hypoparathyroidism greeted me on that side.

7 short months before that, I had greeted my precious baby boy for the very first time. I was still recovering from bearing and bringing a tiny human in to this world. I was lumpy, fluffy, marked, and wrinkled because I had added a beloved member to our family. My body had been feeding him, sustaining him, comforting him for 9 months within my womb and then the seven outside. I would look at myself in the mirror in the morning, clad only in my knickers or birthday suit, and would silently and scornfully chant what I had muttered to myself in the mirror since I was oh, probably age 14... "You aren't beautiful now, but once that lump, and that mark, and that wrinkle are gone, once that line curves more inward, and that line more outward, once that bump is bigger and that one obliterated... THEN you will be beautiful." And I would march off in disdainful resolution or dull self loathing. No matter how many times my husband, my mom, my friends, my relatives, the construction worker on the street, advertisements, cliche slogans or WHATEVER would tell me otherwise, that dull droning chant would always win. 

fullsizeoutput_6951.jpeg

2 surgeries and the scar it left behind is what it took for my body to rebel and my mind to silence the chant. The very ugly 3 inch surgical scar on my neck brought the very literal lie I had believed to light: I am not beautiful right now. "I would be beautiful if that lump wasn't there, I was beautiful when the scale said a number that was 10 digits lower than the one I see in front of me, I will be beautiful when the bump is obliterated." This was the never ending chant that blinded me. You see, I tried to hide that ugly scar at first, mostly because I simply didn't want to horrify people and/or draw attention to myself. I wore scarves or turtlenecks, or high collars around my neck to cover it up even though it made the scar itch and me sweat like crazy. Then one day when talking to a dear friend about this she simply said, "Who cares? That scar is badass, it shows what you've overcome, it shows your story, it's beautiful." So, I embraced it. I looked at myself in the mirror and said "Who cares? You are badass, that scar shows that you fight that disease filled enemy every single day so that you don't have a seizure and die, those marks paint the story of how you grew two tiny humans inside you, those wrinkles reveal that you not only ensure those tiny humans survive but also thrive daily. You create with those hands, move that booty to dance, run to tickle your son with those feet, hold tight to your daughter with those arms, embrace your man with that body. You are here - living, breathing, beating, after 31 years because this body has carried you through all of this and THAT makes it beautiful." 

Along with so many others, I can wholeheartedly say that 2016 has been the worst year of my life, and yet I do wonder if that dull chant would still be droning along if 2016 hadn't brought that scar.

Our bodies paint a picture of our lives - and all the scars, bruises, curves, twists, and turns that it entails. THAT in and of itself is what makes us beautiful because it weaves the inward tale to the outward embodiment of it. I didn't realize how much that chant had me shackled, chained, and weighed down until something much greater took hold of me and threatens my life and body every day. Now I see it, I see the strong inner beauty that is there right now, and I embrace my outward beauty with an appreciative smile, being thankful that it has simply carried me this far.  

Not only is the butterfly the symbol for many thyroid related diseases, it also symbolizes spiritual growth, freedom, hope, and a major life transformation.

Not only is the butterfly the symbol for many thyroid related diseases, it also symbolizes spiritual growth, freedom, hope, and a major life transformation.

I have been wanting to create a "naked" cake (meaning, no frosting on the outside, only on the inside) for quite some time and while this isn't quite technically a fully naked cake I guess you could call it a "barely naked" cake as the glaze drips and spills over the sides. Whatever it's official name, it is SCRUMPTIOUS and probably in my personal top 5 cake favorites. I wholeheartedly wish a blessed New Year to each of you full of strong new beginnings and a joy-filled passion for life itself.


Chocolate Cake

Ingredients:

2 cups sugar
1-3/4 cups all-purpose flour
3/4 cup unsweetened cocoa powder
1 tablespoon Black Cocoa**
2 teaspoons baking soda
1 teaspoon baking powder
1 teaspoon kosher salt
2 eggs
1 cup buttermilk
1 cup black coffee
1/2 cup vegetable oil
2 teaspoons vanilla extract

Directions:

Heat oven to 350°F. Butter and flour two 9-inch round baking pans. Set aside.

In the bowl of a stand mixer fitted with the whisk attachment or in a large bowl with an electric mixer, combine the sugar, flour, cocoa(s), baking soda, baking powder. Mix on low until dry ingredients are thoroughly combined. Mix together the eggs, buttermilk, coffee, oil and vanilla in a separate bowl then slowly incorporate them in to the dry ingredients. Beat on medium speed for about two minutes; the batter will be thin. Pour batter evenly into prepared pans.

Bake in preheated oven for about 35 minutes or until wooden toothpick inserted in center comes out clean. Cool 10 minutes; remove from pans to wire racks. Cool completely.

*Disclaimer- I do not own this recipe, it is from my collection of tried and true recipes, this recipe is coming to you from My Baking Addiction who adapted it from Hershey's Black Magic Cake.
**I have found this product at my local Sur la Table or I have bought it online via King Arthur Flour's website


Raspberry Buttercream

Ingredients:

4 large egg whites, room temperature
1 1/4 cups sugar
3/4 pound (3 sticks) unsalted butter, softened and cut in to cubes
1 1/2 cups plus 1 tbsp fresh strawberries, pureed

Directions:

Place whites and sugar in a heatproof bowl set over a pot of simmering water. Whisk until sugar dissolves and mixture registers 160 degrees on a candy thermometer.

Remove from heat, and pour mixture in to a stand mixer. Whisk on medium-high speed until the mixture has cooled and stiff, glossy peaks have formed. Reduce speed to medium, and add butter, 1 piece at a time, whisking well after each addition

With mixer on low, slowly add strawberry puree, about a 1/4-1/2 cup at a time, mixing thoroughly with each addition, beat until smooth, about 3 to 5 minutes.


Dark Chocolate and Honey Glaze

Ingredients:

3 oz Heavy whipping cream
1.5 oz light corn syrup
1 oz Canola oil
1.5 oz honey
4 oz dark chocolate, finely chopped
1 oz whole milk

Directions:

Bring .5oz of the cream, the corn syrup, oil, and honey to a boil in a saucepan with heat on low. 

Add the chocolate and, using a rubber spatula, mix until combined.

Blend in the milk and remaining cream.


Assembly:

If you are unfamiliar with leveling, cutting, or frosting cakes I would suggest checking out this tutorial before this next step. If you're a serious newbie and four layers sounds intimidating, no worries, just stick to the two layers you baked and fill with a bit more buttercream in the middle. Just be sure to still level those lovelies.  

Level one cake layer and cut it in half horizontally, then repeat with the second layer. You will now have 4 total layers of cake. Place the first layer on a disposable cake round or cake plate. Fill the first layer with enough buttercream to form a 1/2" layer, making sure a small amount spills over the sides evenly. Place a layer of cake over the filling. Repeat this process with the remaining cake layers.

IMG_2861.JPG

thankful hardship

Charin Kent November 24, 2016

Oxymoron- something (as a concept) that is made up of contradictory or incongruous elements.

Thankful hardship. This has been the hardest year of my life, but I have sincerely never been more appreciative of LIFE. Being able to pick my child up and kiss him on the cheek. Watching the sun rise with pinky golden hues gently glowing over the Chicago skyline. Holding my daughter's snug hand while she skips alongside me to school. Hearing my breath move in to my body, then fall out, my heart beat tick steadily on my wrist. A sweet impromptu caress from my love. A simple message from a friend with 4 heartfelt words, "How are you doing?" My parents who bleed with me, dance with me, pray with me. A hip hop song of hope and peace that guides me through the heated stormy seas of emotion. A genuine smile from a complete stranger. The taste of coffee with cream in the morning. Freedom from a hospital bed. Stubborn endurance through running many fiery trial-filled races. The ability to pipe a buttercream rosette. Small, power-filled words. Hope. Trust. Believe. My Father that shines bright where I am blind, never leaves me, always strengthens me. 

Through enduring trials this year that stripped me from anything I called MINE I stumbled upon a deeply profound truth. Thankfulness does not ask to be elaborate, or need to be sexy, or beg to be understood, it just is. It's simple in its honest transparency and can pierce light in to the darkest of days, if we let it run free. On this Thanksgiving day I am in a humbled posture of gratitude and deeper knowledge of thankfulness more than I have known, and that, my friends, I honestly wouldn't trade for anything.

I am currently writing to you from my husband's hometown of Dallas, Texas... HOWDY! I wanted and needed to make something for Thanksgivng that didn't require a Kitchenaid so I decided to make a snacking cake. Once I finished the cake I wanted to level it, because I am crazy particular about such things, but then I was left a ton of cake scraps. So I decided to make some fun cake balls out of them to adorn the top of the cake. It was a really fun cake to play with and will be perfect for day of and days after Thanksgiving cake as it goes well with coffee, tea, cocoa, this apple pie that I also made, and pretty much any fall sweets. Happy Thanksgiving y'all!

IMG_2862.JPG
IMG_2863.JPG
FullSizeRender_2.jpg

Pumpkin Snacking Cake

Ingredients:

2 2/3 cups plus 1 tbsp all-purpose flour
1 1/2 teaspoons baking powder
1 teaspoon baking soda
2 teaspoons ground cinnamon
1 teaspoon nutmeg
1 teaspoon ground ginger
1/2 tsp Salt
2 sticks unsalted butter, softened
2 cups packed light-brown sugar
3 large eggs
15 oz canned solid-pack pumpkin
1 teaspoon pure vanilla extract
1/2 cup low-fat buttermilk

Directions:

Preheat oven to 350 degrees. Butter and flour a metal 13x9" baking pan. 

Whisk together flour, baking powder, baking soda, cinnamon, nutmeg, salt, and ginger.

Beat butter and sugar with a mixer (either stand mixer or handheld) on medium speed until pale and fluffy, 3 to 4 minutes. Beat in eggs, 1 at a time. Beat in pumpkin; add vanilla. Reduce speed to low. Add flour mixture in 3 additions, alternating with buttermilk, and beginning and ending with flour. Scrape down side of bowl as needed. Pour batter into pan. 

Bake cake until golden brown, pulling away from sides of pans, and until a toothpick inserted into the center of each comes out clean, about 35 minutes. Let cool in pan set on wire racks for 15 minutes. Invert cake onto rack. Let cool completely. Level the top of the cake and return to baking pan or place on rectangular dish.


Cream Cheese Frosting:

Ingredients:

1 pound cream cheese, softened

1 stick unsalted butter, softened

1 1/2 cups confectioners' sugar

1 teaspoon pure vanilla extract


Directions:

Beat cream cheese, butter, and 1 cup sugar with a mixer on medium speed until combined.

With machine running, add remaining 2 cups confectioners' sugar, 1/2 cup at a time, beating well after each addition.

Add vanilla extract, and beat until pale and fluffy, about 2 minutes more.


Pumpkin Cream Cheese Cake Balls

Ingredients:

Leftover cake scraps from Pumpkin cake, broken in to bits

1 cup cream cheese frosting

1 lb white chocolate

Directions:

Mix cake scraps and frosting together in large bowl until mixed well and incorporated. Place in the freezer to cool for 45 minutes. Roll mixture into balls, place back in bowl once finished, then place the balls back in the freezer for 45 minutes to firm up. Melt the chocolate. Line a baking sheet with wax or parchment paper. Dip each cake ball in the white chocolate scraping any excess off the bottom. Place the dipped ball on the baking sheet, repeat with remaining cake balls. Place in the fridge to harden for at least 30 minutes. 


Assembly:

Frost the top of the snacking cake with the remaining cream cheese frosting. Top with cake balls... et voila, fin!

Celebratory kiss after receiving the news that I beat cancer.

Celebratory kiss after receiving the news that I beat cancer.

the healing nature of empathy

Charin Kent November 17, 2016

"So, what you're saying is if I stay on the current treatment plan that I am on, not only will my quality of life (which already sucks) not improve, but it will most likely only get worse. Also, the likelihood of acquiring kidney illnesses, diseases, or stones will become extremely high. On the flip side, if I start a different treatment plan, which is relatively new and the long term affects of which are still not entirely known, my body may respond well and thus my quality of life may improve, but it also may not at all. Also, there is a risk of acquiring osteosarcoma, bone cancer. It's a small risk, but the fact that I even have this illness to begin with is due to an unfortunate small (1%) risk, so the fact that the risk is small still does not sit very well with me these days." I said bluntly. 

"Correct." He responded.

I learned from my endocrinologist that my cancer treatment was successful. For now, there are no signs of disease. When I discovered this I felt joyful and victorious. One medical horror hopefully behind me, this is a wonderful event indeed. That night I sat in the joy of it all, and soaked in the peace it brought. 

Then the sun rose on a different day and still... I am trapped. I want to talk myself out of feeling down, out of feeling despair. I hear the voice in my head, "Be appreciative that you accomplished something, even if you can't do anything to ultimately control your future, at least you can be happy for this!" And it's true, and I am. Yet it does not change the fact that I am sad, I am conflicted, I am confused, I am trapped, I am mourning. 

I am mourning the careers I could have started, mourning the loss of children I wanted to add to my family, mourning the burden I will put on those closest to me. "But you never know! You could maybe still start that coffee shop/bakery in the city one day! Oh sure there's the little fact that it is well known to be one of the most stressful industries to enter into, and stress and anxiety are well known to trigger seizure like symptoms for you, but never mind that... you can do anything you set your mind to!" Yes, that is true, I can try to do anything that I set my mind to, but unfortunately the likelihood of it both actually being successful and me staying alive through the trying process is pretty much non existent. So I mourn this possible future. Darkness of possible catastrophes surround my mind and my reality, and I am trapped in them. If I am honest, I have pretty much given up on trying to make myself feel better because, it just really really sucks. 

I am fully aware of the fact that many of you reading this feel either extremely uncomfortable, or extremely motivated to help me right now, or both. There is a reason I feel compelled to write this, though. Something I have noticed about humanity through this year of tragic event after tragic event is that we are HORRIBLE at dealing with sadness. Notice the WE... I am not leaving myself out of this equation. When I am hurting, in pain, or grieving, I have tried over and over again to just make it go away because it makes me feel helpless and I loathe that feeling. If you have ever watched the movie Inside Out you'll understand this concept. The "Joy" in me shoos away the "Sadness" like a masterfully jubilant dictator with those "But, you can still do anything you set your mind to!" voices. When that doesn't work then "Anger" starts yelling at "Sadness" saying things like, "Do you think being sad ever accomplished anything ever? Sit up and get over yourself!" Once that sends me in to a world of self loathing then "Fear" tries to chime in, "Ok but, you really can't be sad forever, alright? I mean, what will people think of you if you just keep talking about how bad this is? Look at that slight change of expression on your friends' face when you told her your week was hell... AGAIN. See, if you keep going like this all of your friends will be disgusted with you." To which "Disgust" chimes in, "Uh... I'M disgusted with you, why are you even here anyway? Go away, you're totally bumming everyone out." 

Our emotions have wondrously unique and intricate roles that weave a gorgeous tapestry that makes us who we are. Joy, anger, disgust, and even fear are understood for their overall value, but sadness? That one is continually misunderstood and shunned. Try as I might I cannot make sadness go away... because the reality is... I AM SAD. I beat cancer, yes, but the "cure" stabbed me in the back. That is heartbreaking. That is tragic. That should never have happened, but it did. The beautiful thing I have found through this journey is that there is great healing power when I simply let sadness weave that deep blue thread into my intricate tapestry. So you can feel free to just let me sit and mourn, because it makes me a part of the unique person that I am. I will not let it rule every part of me, but it does reflect a part of me and my story. I will let those other emotions work their magic where they fit best, but sadness owns this part. 

The art of true empathy is what can be birthed from sadness. Some of the moments when I have experienced deep emotional peace have not been when I discovered a new medication dosage or cheerful slogan, it's been when someone has come by my side, given me a hug and simply said, "I am so sorry you are going through this. I wish I could take away this pain right now, but I can't. I care about you and I am here for you." It sounds too simple, but sometimes, it's all someone needs.

My friends, empathy is an incredibly powerful tool of love that should never be overlooked. We are certainly in need of this grace filled characteristic, so let's start by simply letting it walk alongside us daily. I implore you as one who has experienced the compelling beauty it brings: embrace and give freely of this powerful gift today. 

The past month has been a whirlwind of sickness, travel, and more sickness. Once all the vomit, snot, and crankiness had rid itself of my household my daughter and I made some cookies to brighten the day of some people we love. Often times I can become overwhelmed with the incredibly complicated and intensely depressing seasons I find myself and my friends and family in. A simple go to step of love and care that I have found is to bring them baked goods, hugs, and flowers. Usually I try and give all three simultaneously, along with a note or verbally speaking what I mentioned above. It does not in any way solve the whole problem, but it does bring a peaceful reassurance of my love and support.  I highly recommend following our example and spreading some of this sunshine to someone you know who is sad today. Sugar cookies are perfect quick portable sweets that can hold an equally sweet message and thus perfect for such an occasion as this. The recipes are very simple and are coming once again from one of my favorite baking cookbooks, Baked: Explorations.

fullsizeoutput_6739.jpeg
fullsizeoutput_673c.jpeg
fullsizeoutput_673e.jpeg

Sugar Cookies

1 3/4 cups all purpose flour
1/4 teaspoon salt
1/4 tsp baking powder
3/4 cups (1 1/2 sticks) unsalted butter, softened
2 tbsp cold vegetable shortening
2/3 cup sugar
1 large egg
1 tsp vanilla

In a medium bowl, whisk together the flour, salt, and baking powder and set aside.

In the bowl of an electric mixer fitted with the paddle attachment, beat the butter, shortening, and sugar together until light and fluffy. Add the egg and vanilla and beat until just combined. Add the flour mixture and mix until incorporated. Wrap the dough in plastic and refrigerate for at least four hours.

Preheat the oven to 325°F. Line 2 baking sheets with parchment paper.

Dust a work surface with a sprinkling of flour. Unwrap the chilled dough and put it directly on the work surface. Roll the dough out to 1/4 inch thick. Use your desired cookie cutter to cut shapes in the dough and transfer the cookies to the prepared baking sheets.

Bake the cookies for 12 minutes until they are set but not browned. Remove them from the oven and place the baking sheet on a cooling rack for five minutes. Use a spatula to transfer the cookies to the rack to cool completely.


Basic Royal Icing

2 cups powdered sugar, sifted
2 large egg whites
2 tsp freshly squeezed lemon juice

In a large bowl whisk together the sugar, egg whites, and lemon juice until the mixture is completely smooth. The mixture should have the texture of a glaze. If the mixture is too thin add a bit more sugar. If the mixture is too thick add a few drops of lemon juice. You can add a few drops of food coloring if desired or you can divide up the icing among many mixing bowls if you need more than one color.

The best way to ice sugar cookies is with a pastry bag fitted with a small or medium round piping tip.  First outline the cookie or design, then fill it in. Let the icing harden before serving. The cookies can be kept in an airtight container for up to three days.


a note of love for my tiny wild child

Charin Kent October 12, 2016

You, my tiny one, only want to know what you cannot have. I see your intelligence blossom, I see you struggle to glean every ounce of knowledge you can, and when I say “No, this is not safe for you.” your whole world turns upside down because you cannot attain the knowledge you so crave. I get it. I really, Really, REALLY get it.

I see a piece of me in you every time you lay on the floor, kicking the ground in frustration because I will not let you tumble down the stairs. I understand your anger at me for not letting you eat trash. I can empathize with your confusion as to why I will never let you run in to the street. While I understand your tenacious spirit, it still drains every particle of energy inside me as your boisterous pursuits send my jittery heart boiling over with sheer dread and as my defective body strains to simply keep up with you. You cannot yet comprehend the devastation and heartache that will accompany what you see as simply pursuing knowledge, but I do. I get it. I really, Really, REALLY get it. It wasn’t that long ago that I, at age 30, was having a similar conversation with a parent of mine in which I was screaming, “WHY CAN’T I HAVE WHAT I WANT RIGHT NOW?!” 

I see you my brave and beautiful love, I see you. I love your curious mind, I love your soul that craves proficiency, I love your adventurous heart. I will love you by cultivating your need for adventure, I will love you by teaching you how to be safe in the midst of danger, I will love you by letting you discover every single safe nook and cranny. You do not understand the explanation I give you right now, but I will still keep you from absolute danger simply because I love you and know that some day you will understand.


With all my love,
Your weary in body, but strong in heart Mama

fullsizeoutput_65c8.jpeg
fullsizeoutput_65cc.jpeg
fullsizeoutput_65c6.jpeg

In my usual fashion, I was thinking about what I wanted to bake to go along with this post and I decided to bake something that I absolutely adore, but feel stretched and perplexed baking… pie. I really hate the phrase “easy as pie.” Pie making comes so easily to some people as I believe parenting comes very naturally for some, but I would not say that pie making (nor parenting) has come easily or naturally to me. Hear me though, I love pies… but making them has proven to take much more practice, patience, and tenacity than I originally thought it needed. I can say the exact same thing about my journey with parenting. So here is a break from the usual cake recipes. This pie turned out exactly how I wanted it to in taste and texture, and I think it would be a perfect addition to a Thanksgiving or Christmas meal. I know this beauty will certainly be adorning my holiday feasts this year, which I am eagerly counting the days down to!  Letters and lists of love will keep me strengthened in heart while my body aches, and I hope any tired moms and dads out there are encouraged as well. You are loving your child even if they communicate otherwise to you for not letting them eat trash.

This pie recipe is partially brought to you by the incredible cookbook, Baked: New Frontiers in Baking. This cookbook along with Baked Explorations are my favorite intermediate skill level baking cookbooks. I highly recommend getting them if you are wanting to push yourself in baking and create some DELICIOUS baked goods. Cranberries and vanilla bean are synonymous  with holidays to me so I decided to incorporate them in to their classic apple pie recipe for my own spin. 


Vanilla Bean Cranberry Apple Pie

Classic Pie Dough

Ingredients:

3 cups All Purpose Flour
1 tbsp sugar
1 tsp salt
1 cup (2 sticks) cold unsalted butter
2/3 cup ice cold water

In a medium bowl, whisk the flour, sugar, and salt together.

Cut the cold butter into cubes and toss the cubes in the flour mixture to coat. Put the mixture in the bowl of a food processor and pulse in short bursts until pieces of butter are the size of peas.

While pulsing in quick, 4 second, bursts, drizzle the ice water into the food processor through the feeding tube.

As soon as the dough comes together in a ball, remove it from the food processor and divide it into two equal balls. Flatten to a disk and wrap in plastic wrap. Refrigerate the disks until firm, about 1 hour. 


Pie Filling:

Ingredients:

1/2 tsp cornstarch
1 cup firmly packed light brown sugar

2 tbsp butter
7 medium Granny Smith Apples
2 tsp vanilla bean paste, or 1 whole scraped vanilla bean
1 tsp whiskey
1 tsp cinnamon
1/4 tsp nutmeg
1/2 cup dried cranberries
1 large egg, beaten

Dust a work surface with a sprinkling of flour. Unwrap one of the balls of chilled dough and put it directly on the work surface. Roll out into a circle that is 1/8" thick. Transfer the dough to a pie dish and carefully work it into the pie dish, there should be about a 1 inch overhang from the pie rim, trim the edges to ensure an even rim of dough (I am an extreme visual learner and have found this tutorial to be super helpful when it comes to getting the perfect double pie crust technique). Place in the freezer and chill until firm, about 2 hours.

Preheat the oven to 375 degrees F. In a small bowl, whisk together the cornstarch and the light brown sugar. Peel and core the Granny Smith apples, then cut them into 1/8-inch wedges.

Heat the butter over medium heat in a large heavy-bottomed saucepan. Swirl the saucepan occasionally until the butter begins to brown. As soon as the butter is evenly browned add half of the apple wedges and cook over low heat for 10 minutes or until the apples are softened.

Add the remaining apples and the cornstarch sugar mixture. Mix until the sugar has melted, then add the vanilla, whiskey, cranberries, and cinnamon to the sauce pan and cook for five minutes, or until the filling is bubbly and thick. Do not over cook.

Dust a work surface with a sprinkling of flour. Unwrap the remaining ball of chilled dough and roll out into a round that is 1/8" thick.

Pour the pie filling into the frozen pie crust, and top with the second dough round. Trim the dough, leaving a 1 inch overhang. Crimp the edges together, brush the top with the beaten egg. Cut three steam vents into the top crust. Roll out any dough scraps and use a mini cookie cutter of your choice (I like using this one for fall pies) to cut out pieces to embellish the top of your pie. Place these pieces on top of the pie as desired and egg wash the pieces as well.

Bake the pie until the filling bubbles and the crust is golden brown, about one hour. Cool the pie on a rack for one hour. Serve warm or at room temperature.

cake error

Charin Kent September 25, 2016

Trial and error, Trial and error, ERROR, trial.... error, trial and error. This is pretty much my whole life right now. Everywhere I turn I must try and see what works for me and what does not and the results vary, GREATLY. There are times when this exercise is suffocating and I want to quit, but morbidly enough quitting would mean literal death. There is no quitting the intake of 4 different medications, taken 4 different times a day, every day, as well as the weekly one (which dang it I need to take that...). Living with a rare chronic illness is a constant battle of trial and error because rare illnesses usually do not undergo as much medical investigation as the major ones do. So you are left with figuring many personal healthy guidelines on your own as the depth of medical knowledge and remedies are limited. Practically how this looks is, I try a new medication dosage that my doctor prescribes to see if it will help the issues I am currently facing... ERROR. My hands shake, my brain struggles to remember the word for "apple", my back muscles constrict in anxious strain, I have a panic attack. Ooooo K.... So that doesn't work, let's try and recover now (which is also a trial and error process to figure out what that even entails). It's a discouraging process, but I can't view the "error" as a mistake per se, or rather I can't look at it as I failed, or am a failure, because the result wasn't what I wanted. The short term remedies vary greatly from person to person and the only way to discover what fits me best is... You got it! Trial and error. 

I have learned an invaluable amount of life lessons since acquiring hypoparathyroidism (the aforementioned rare chronic illness) after 2 neck surgeries performed on me in January. Oddly enough, if I'm being honest, there are times when I am actually grateful for having acquired this illness. What?! Yes, it's weird, and of course I would take a safe and sound cure if there was one in existence, but there isn't. So in the meantime I am choosing to move forward with where I am at instead of focus on what I cannot change immediately, as I know that leads to a world of depression... which is also a symptom of this damn illness... YAY! One such lesson I have learned through this lovely process of trial and error is the absolutely stunning art of giving unceasing grace to myself and not judge others based on the outside. I don't know how I could have learned this down to my bones and soul if it wasn't through a huge trial and being shackled to illness, and thus why I am sometimes thankful for it. 

What got me thinking of this was a cake I made the other day. Once finished, this cake looked ok, maybe a little crooked or slightly disheveled to my ever-critical eye, but all in all... Sure, it looked fine. I felt myself identifying with this cake as I sliced it open to take a look at the naked inside. I knew it already, but the evidence was obnoxiously glaring me in the face. I had mixed up the ingredients for the cake batters and the result was that the cake did not accomplish the lofty goal I have for every cake I make- near perfection... It was nowhere near it. The outside looked cute, and maybe to an untrained eye the inside didn't LOOK disastrous, but I knew, and a trained eye would know too, the texture for the pumpkin cake was chewy, the peanut butter cake much too dry. The inside was not as it should be, it was awry, it was flawed, it was off, anything but perfection. I may look ok on the outside, perhaps a bit disheveled, but to the trained eye my inside is awry, flawed, and off balance. 

I really don't aspire to be a "near perfect" person, but often I place that burden on what I produce, so as I stared at that cake I had an interesting revelation. When I embarked on making that cake I knew it probably wasn't a wise choice because I most likely wouldn't get the result I wanted. My brain was foggy, my body ached, I could barely remember where I kept my flour bin (I am in the middle of a medication adjustment which means side effects such as these), but I felt a strong creative urge to bake and attempt to rid myself of the hypopara blues. So I took a leap and just tried. The result wasn't what I wanted, but looking back I don’t think it was a mistake or error I need to feel ashamed or discouraged about. Even though I should technically “know better” (as I have made those recipes loads of times) baking that cake was for me and my enjoyment. I was glad I got to bake at all that day, because my body doesn't allow me to do even that on any given day. I was glad at the very least I got the chance to have fun and play with flavor combinations and the outward appearance. I gave myself a healthy dose of grace in that moment by embracing the joy of simply baking a cake instead of focusing on what I could not change immediately. Sure, now I know next time that when I am feeling the way I did I should not make an important cake that people depend on, but on the other hand, I do know that I can still bake and thus accomplish something just for me. 

I don't know what state your cake innards are in, maybe they're near perfection, but if they're like this little flawed cake, give them some grace, learn what you can from them, and know that just trying is a wonderful accomplishment.

So this cake is an extremely odd ball one, only make it if you are either fed up with the typical pumpkin pairings and want something different, or if you are in to funky and bold flavors, as both those reasons are what inspired me to come up with this little ditty. I loved it, but it's certainly not for everyone. Don't worry, I tried the recipe again after the failure moment above, the cake turned out great when I was feeling a bit more with it and remade it a few days later. Happy start of fall y'all!


Peanut Butter Cake


Ingredients:

3/4 cup and 2 tbsp all-purpose flour
1 1/8 tsp baking powder
1/4 teaspoon salt
1/8 teaspoon baking soda
3 ounces unsalted butter, softened
2/3 cups sugar
1/3 cup natural, creamy peanut butter
2 large eggs
1/4 teaspoon pure vanilla extract
1/4 cup sour cream


Directions:

Preheat oven to 350 degrees. Butter and flour 2 6” cake pans. 

Whisk dry ingredients in a large bowl. 

Cream butter, peanut butter, and sugar with a mixer until light and fluffy. Add eggs, 1 at a time, beating after each addition, then add vanilla.

Reduce speed to low.  Add dry ingredients to butter mixture in 3 additions, alternating with sour cream and ending with dry. Scrape sides of bowl. Divide batter between the 2 8” pans, smoothing out the tops.

Bake cakes until tester inserted into center comes out clean, about 25 minutes. Let cool in tins on wire racks. Cakes will keep, covered, for up to 2 days, unless otherwise noted.


Pumpkin Cake


Ingredients:

1 1/3 cups plus 2 1/2 tsp all-purpose flour
3/4 teaspoons baking powder
1/2 teaspoon baking soda
1 teaspoon ground cinnamon
1/2 teaspoon nutmeg
1/2 teaspoon ground ginger
1/4 tsp Salt
1 stick unsalted butter, softened
1 cup packed light-brown sugar
2 large eggs
7.5 oz canned solid-pack pumpkin
1/2 teaspoon pure vanilla extract
1/4 cup low-fat buttermilk


Directions:

Preheat oven to 350 degrees. Butter and flour 2 6” round cake pans. 

Whisk together flour, baking powder, baking soda, cinnamon, nutmeg, salt, and ginger.

Beat butter and sugar with a mixer on medium speed until pale and fluffy, 3 to 4 minutes. Beat in eggs, 1 at a time. Beat in pumpkin; add vanilla. Reduce speed to low. Add flour mixture in 3 additions, alternating with buttermilk, and beginning and ending with flour. Scrape down side of bowl as needed. Divide batter between pans.

Bake cakes until golden brown, pulling away from sides of pans, and until a toothpick inserted into the center of each comes out clean, about 35 minutes. Let cool in pans set on wire racks for 15 minutes. Invert cakes onto racks. Let cool.


Fall Spiced "Hot" Chocolate Buttercream


Ingredients:

3/4 cup sugar
3 large egg whites
1 cup (2 sticks) plus 6 tablespoons unsalted butter, softened
3.5 ounces unsweetened chocolate, melted and cooled
1 1/2 tsp cinnamon
1/2 tsp nutmeg
2 tsp vanilla bean paste


Directions:

Place egg whites and sugar in a heatproof bowl set over a pot of simmering water. Whisk until sugar has dissolved and egg whites are hot to the touch. Test by rubbing the mixture between your fingers; it should feel completely smooth. Transfer mixture to a mixing bowl fitted to a mixer stand, and beat on high speed with the whisk attachment until cooled, 7 to 10 minutes.

take about 1/2 a stick of butter and combine with the cinnamon, nutmeg, and vanilla paste in a small bowl, set aside.

Set mixer on medium-high speed; add butter, 1 to 2 tablespoons at a time, until incorporated. Beat in the spiced butter mixture, then the chocolate. Use immediately.


Assembly

If you are unfamiliar with leveling or frosting cakes I would suggest checking out this tutorial before this next step.   

Level one cake layer, then repeat with the 3 other layers of cake. You will now have 4 total layers of cake, 2 peanut butter, 2 pumpkin. Place about 1/3 cup buttercream in a piping bag fitted with a small French tip (I used a 5mm french tip). Place a layer of pumpkin cake on a disposable cake round or cake plate. Fill the first layer with enough buttercream to form a thin layer, making sure a small amount spills over the sides evenly. Place a layer of peanut butter cake over the filling. Repeat this process with the remaining cake layers. Frost the cake with remaining buttercream. Pipe the buttercream along the bottom and top border. Sprinkle some cinnamon or nutmeg over the top if you feel so inclined.

let's celebrate! part 2

Charin Kent September 17, 2016

Now to continue my story of a mirth-filled visit to Disneyland. If you missed my last post, I suggest you take a few (well several ;) minutes and catch up as I am going to plunge right in and some of the message will be lost if you are unfamiliar with what has led me up to this part of the tale.

Once we boisterously welcomed all who came to that happy place, we quickly skipped to our first arduous task of the day... eating a gigantic breakfast surrounded by larger-than-life silly, quirky, and joyous characters. Plaza Inn was our destination, their character breakfast was our task. I am sure that pretty much everyone has seen at least one classic picture of a friend, coworker, family member, random acquaintance where there is that obligatory pose with a Disney character, be it Mickey, Minnie, Princess, Grumpy, Winnie the Pooh... or Tigger too. However, if you have never been to a Disney theme park then you are probably not aware of the toil that usually accompanies this one quickly snapped picture, nor the imaginative and incredibly talented cast members (Disney’s name for employee) that are behind those masks or makeup. The "toil" are the lines one must maneuver to meet these characters as they can sky rocket and consume most of your precious time (especially at Disney World), BUT there is a reason for it. An amazingly beautiful and heartfelt talent is given to each guest these cast members meet. For youngsters this meeting can be undeniably precious as you can see their eyes light up and the wheels turn in their head and wonder, even for just a second, if the characters from their favorite fairy tales are actually real and if those stories can really come true. The characters never ever shatter the dream that their fairy tale story is true, and in so doing they can even make adults forget, even for a second, that their story is a fictional one. However cheesy that obligatory smiley picture may look, you can be almost certain that there was a lot of imagination and wonder that accompanied it on both sides of the seemingly simple greeting. The character breakfast we participated in had delicious food and unbelievably witty and playful characters, with no lines to meet them as they came to our table. It was absolutely memorable and every one of our kiddlets basked in freely letting their imagination roam and dance with the talent that lay behind those masks and makeup, a courageous and unique feat in the time they live in.

IMG_1736.jpg
IMG_1752.jpg
IMG_1745.jpg
IMG_1755.jpg
IMG_1774.jpg
IMG_1757.jpg
IMG_1762.jpg
IMG_1765.jpg
IMG_1772.jpg
IMG_1769.jpg

Once some rides were accomplished, we made our way through Toon Town to meet the mouse... Mouses... Mice. Our first stop was Minnie's house, then we planned to go to Mickey's. At the end of touring each house we would be able to meet the mouse-house-owners themselves. We arrived at the open door to Minnie's house and a cast member was there to let us know when we could proceed into the humble pink, white, and polka dotted abode. This cast member's name was Kaylee, and just typing her name creates happy tears in my eyes as I reflect on how her kind and genuine actions that day shaped my sister and nieces' view of their beautiful adoption story.

My courageous nieces have endured hardship, abandonment, neglect and countless other trials in the, roughly, 7 and 10 years of age they possess. Independence, self sufficiency, and self protection were skills immediately acquired in order to simply survive when they were abandoned at ages one and four. Their exact birth names, their biological family, their birthdates are unknown to this day. The majority of life for these precious girls have been anything but carefree and child-like. When my sister took them in as her foster children she knew the trials she faced in choosing to care for and later adopt these girls, because she was adopted herself. She knew the pain it could bring her, she knew the challenge it would present, she knew it would require sacrifice, she knew it would take abundant unconditional love, she knew it would take every ounce of energy she has. She knew all of this, looked these facts square in the face and bravely chose adoption, no matter the cost to herself. I cannot think of many other acts that show a truer representation of pure love and redemption here on earth. She has not only given them every physical need but also every ounce of encouragement and emotional care they could want. The exquisite result is that they are thriving and enjoying their childhood, a childhood that could have so easily been riddled with horror upon unimaginable horror. The unfortunate truth is that, due to the unconventional nature of this particular adoption, this budding little family has experienced prejudice and adversity where celebratory support should have reined. Carin and Yvette now have educational opportunity, they now have childlike freedom, they now have considerate care, they now have every physical need met, they now have aunties (or Tia as they call me ;), they now have cousins, they now have uncles, they now have a supportive community, they now have a boundlessly loving mother, they now have hope. This is to be celebrated.

Kaylee heard their adoption story, and Kaylee led a Disney-fied celebration. She told us to come see her after we met with Minnie, because she had a surprise for us. Once we met Minnie, Kaylee took Carin and Yvette by the hand and said, “How would you like to meet Mickey right now? I think he will want to hear your story and celebrate with you right away!” She led our entire group through the exit to Mickey’s house (which essentially means we went to the front of the line… and the line was about a half hour long), waited and chatted with us for a few mere minutes before all of a sudden, we were greeted by Mickey and several other cast members who had heard their story and wanted to congratulate Amie and the girls on the adoption. I am quite certain that every adult eye in that room had a moment of mistiness as they saw Carin and Yvette’s eyes completely light up with joy when they met Mickey, danced a celebration dance with him, and he gave them an enormous bear hug of delight. It didn’t end here, Kaylee then took us to see Pluto, who was also in ToonTown at the time, and then she said she had something even more special for us. Off she went and quickly came back with 9 pins, each stating, “I'm celebrating: Adoption”, then she took us over to Donald and Daisy, where after a bit of a wait, they escorted Carin and Yvette, hand in hand, through ToonTown, a celebratory parade of their adoption. I don’t know how to describe the impact of these simple gestures other than to say it was pure reverent magic. It communicated something profound to my sister and her girls- their story is both stunning and unique, it is one to be honored with blissful revelry.

IMG_1921.JPG
IMG_1923.JPG

At every turn of our visit that day cast members would notice the pins Kaylee put together for us and they would look at us in delight and genuinely express their congratulations to Amie, and to all of us who were celebrating this new family. Their smiles gave warmth to these girls who had seen too much coldness in their young lives. Their heartfelt congratulations gave my sister a deep sense of support and encouragement for what she had done. That day, and the next, truly felt like Disneyland’s whole purpose in being open was to celebrate adoption, and this was accomplished through diligently caring cast members. The fact is that there are many, many people who work for Disney that deeply value Walt’s vision for his parks- to be “a source of joy and inspiration to all the world.”* There are incredibly intricate behind the scenes systems in place just so that each guest visiting can feel special, be inspired, and joyfully celebrate. I don’t know what all had to happen for Kaylee to drop what she was doing and lead this celebratory romp, but from what I could gather through sly eavesdropping it certainly took some well-timed logistics from not only her but also several of her coworkers. These coworkers could have dismissed the inconvenience and disruption of this romp since it was an incredibly busy day at the park, but they didn’t, and Disney the company had a plan in place for such an occasion to be embraced, how awesome is that?

IMG_1931.JPG
IMG_1934.JPG
IMG_1810.jpg

My hope is that this post encourages you to take a page from Kaylee’s book and consider how to creatively celebrate someone, be it family member, friend, or 5 minute acquaintance. The impact of this sweet and kind gesture just may heal wounds that others have inflicted, and bring heartfelt cheer to your world and theirs. 

IMG_1798.jpg
IMG_1803.jpg

The recipe I will leave you with is a cake that I made for a jewelry and clothing party I hosted a few weeks ago, but the cake itself was inspired by my sister, Amie. While we are about as polar opposites as you can get, we both love traveling, eating incredible food, and community. I wanted the cake I made to reflect some of her favorite flavors with an added fun spin to them, and this is what I came up with. It’s a great recipe for fall and for sharing with friends and family, maybe even for a Thanksgiving or “Friendsgiving” event, which I can’t believe are already around the corner. Along with the picture of the cake, I have added some other pictures that capture the spirit, awe, and wonder these kids (and my sister, mom, and I) felt on our trip, I hope you enjoy the journey!

IMG_1514.jpg
IMG_1791.jpg
IMG_1823.jpg
IMG_1827.jpg
IMG_1796.jpg
IMG_1939.JPG
IMG_1835.jpg
IMG_1860.jpg
IMG_1864.JPG
IMG_1944.JPG
IMG_1948.JPG
IMG_1950.JPG
IMG_1949.jpg
IMG_2002.JPG
IMG_2007.jpg

From left to right, top to bottom: Quickly snapped pic of the cake for the party I mentioned above, the recipe for which you will find below; me, my mom, and my daughter showing Minnie some love as we Disneybounded as her that morning; one of my prized possessions- LuLaRoe castle leggings! I wore them complete with a tiara and tutu, yay for being a kid again!; my beautiful sis, Amie; meeting Pluto in Toon Town in the middle of our celebratory romp with Kaylee; princess hugs!; sheer delight for every one of our party abounded during the Paint the Night Parade in Disneyland; Carin could not contain her gleeful excitement at seeing every one of her favorite stories come to life during the parade; happily in line bright and early to beat the crowds at California Adventure; woohoo for Cars Land!; more princess hugs!; yeah I think the picture speaks for itself :D; as does this one... which is my favorite ride of all time by the way ;); along with the paint the night parade, World of Color also drew out awe-filled wonder and joy as this nighttime show paid homage to the ideals of Disneyland, really and truly quite a thoughtful and spectacular show; our last night of the trip these cousins walked hand in hand, glowing from the bond they experienced during this trip, and the magic of celebrating the family that was brought together.


Ginger and Spice Carrot Cake:

Ingredients:

3 cups all-purpose flour

1 pound large carrots, shredded

3 large eggs, room temperature

1/3 cup buttermilk

1 teaspoon pure vanilla extract

2 cups sugar

1 1/4 cups vegetable oil

¼ cup coconut oil

1 tablespoon freshly grated ginger

1 teaspoon ground cinnamon

¾ tsp nutmeg

½ tsp cardamom

2 teaspoons baking powder

1 teaspoon baking soda

1 teaspoon salt
 

Directions:

Preheat oven to 325ºF. Butter two 8-by-2-inch round cake pans. Dust pans with flour, and tap out any excess. 

Place carrots, eggs, buttermilk, vanilla, sugar, vegetable oil, and ginger in a large bowl; whisk until well combined.

In a medium bowl, whisk together flour, baking powder, baking soda, salt, and cinnamon. Using a rubber spatula, fold the flour mixture into the carrot mixture until combined. Fold in the toasted pecans.

Divide batter between the two cake pans, and bake until a cake tester inserted into the middles comes out clean, about 1 hour. Remove pans from oven, and transfer to a wire rack to cool, 15 minutes. Turn cakes out onto rack; let stand until completely cool.


Orange scented Cream Cheese Frosting:

Ingredients:

2 pounds cream cheese, softened

2 sticks unsalted butter, softened

3 cups confectioners' sugar

1 1/2 teaspoons pure orange extract


Directions:

Beat cream cheese, butter, and 1 cup sugar with a mixer on medium speed until combined.

With machine running, add remaining 2 cups confectioners' sugar, 1/2 cup at a time, beating well after each addition.

Add orange extract, and beat until pale and fluffy, about 4 minutes more.


Assembly: 

Note: If you are unfamiliar with leveling, cutting, or frosting cakes I would suggest checking out this tutorial before this next step. 

Level each cake layer. To get the look shown below, place about 2 cups of buttercream in to a bowl and tint it (I prefer Americolor gel food coloring) to the darkest shade of color desired for the bottom ombre layer. Take about 1/2 a cup of this tinted frosting and combine with 1 1/2 cups white frosting. Once combined then take 1/2 a cup of this lighter frosting and combine with 1 cup white frosting, you will now have 3 shades of your desired color. Fit 3 piping bags, one with a 12mm french piping tip, another fitted with an 11mm french piping tip, and the last fitted with a 10mm french tip. Fill each fitted piping bag about 2/3 full with the tinted buttercream, each bag will have one shade of color. Place the first layer of cake on a disposable cake round or cake plate. Fill the first layer with enough white buttercream to form a 1/2" layer, making sure a small amount spills over the sides evenly. Place a layer of cake over the filling. Frost the cake with remaining white buttercream, this will not perfectly cover the cake, that is fine you simply want to achieve a crumb coat. Pipe rosettes (Same method as this tutorial that shows you how to cover an entire cake with rosettes, but I used different piping tips, feel free to use the same 1mm star tips from the video if you want that specific look) along the bottom border with the darkest shade of frosting, then pipe rosettes with the next lightest shade for the middle section of the cake, then pipe rosettes with the lightest shade on the top of the cake, and viola! you have a cute and trendy rosette ombre cake!

*This is a quote from Walt Disney's opening day speech at Disneyland, found on this site.

Tags Disneyland, Disney, cast members, celebration, adoption

let's celebrate! part 1

Charin Kent September 9, 2016

You don’t have to know me for very long before learning that while I am passionate about many activities, I am truly obsessed with two in particular. Baking, and trips to DISNEYLAND. Disneyland, Anaheim, Ca. is my home away from home. Now, please don’t misunderstand me here, I am not naive, or have an exceedingly jovial personality that completely ignores the real downsides of my happiest place on earth. Yes, there are long lines, yes it is expensive, yes, tempers can run high, yes, even I slightly cringe a bit when meeting some of the classic Disney princesses due to their bland personalities and stereotypically perfect outward appearance, yes, I am completely aware of the fact that Disney is a corporation hell bent on turning a profit, and no, I personally do not agree with every little thing they do. Ok… now that I have got that dark cloud out of the way I will now plunge in to the heart of why I LOVE this place so much. This will be a 2 part blog post, my hope is that it will provide some thoughtful insight for those who are heading to the house of mouse some time soon and a different perspective to those who are skeptical of said mouse house.

Growing up in the Palm Springs, California area I was the daughter of a pastor. My family was not middle class, if anything we were scraping the bottom of lower middle class and edged in to being a low-income family once my dad became a missionary and we moved to Mexico. We never had the trendiest clothing, we ate cheap imitation brand foods, and anything new or fancy was usually given to us by friends or family. Despite our lack of funds, my parents made an effort to use what little extra we had to create family memories through short trips to locations close by. We went to naturally beautiful destinations such as Oceanside, Idyllwild, and Big Bear Lake, but none were as memorable to me as those handful of 2 hour road trips we took to Disneyland. A trip to Disneyland was synonymous with a celebration, and Disneyland's seemingly sole purpose in living was to  celebrate with me and for me. They would wholeheartedly celebrate imagination, celebrate joy, celebrate love, celebrate memories, celebrate family, celebrate milestones, celebrate creativity, I could keep going but I think you get the giddy school girl picture. For the be-speckled, imaginative, and vivacious little girl that I was (and still am, really) it was a symbol of blissful harmony, outrageous possibilities, creative beauty, and joy at its purest. Fast forward to today and after countless trips back that lovely picture still remains resolutely intact.

IMG_1720.jpg

To capture this blissful essence of celebration I need not go any further than gifting you with the little treasure of a story that is my latest trip to Disneyland. In June my sister, Amie, who lives in Quito, Ecuador, was able to finally make legal what had been official In her heart for years. She legally became the mother to her foster daughters, Carin and Yvette. This process had taken three and a half long years due to several unconventional factors surrounding their particular adoption situation. I knew that when this momentous event was finally finalized we simply had to go to the one place where this new little family would be loudly celebrated with sheer delight. Once the adoption was final, my nieces' visas were in place, and their stateside trip to visit friends and family in order, we planned the dates for our long-awaited celebratory visit to Disneyland. Initially just my mom, me, my sister, and her two girls were going to go on this trip but I wanted to add some youthful joy and cousin bonding time for my new nieces while they were here in the States. So three weeks before our trip, at Carin's small family birthday party, I surprised her as well as her sister and their cousins by letting them all know that they would be celebrating the adoption all together. It was a truly magical moment as the cousins (my daughter and brother's 3 children) were not only thrilled to go to Disneyland, they were also honored to be included in this amazingly festive celebration of their newly adopted cousins.

Three weeks flew by, and my plans were all in place for our 4 day trip and 2 marathon Park day adventure. My 5 year old daughter, 12 and 11 yo nieces, and 8 yo nephew (my brother's children) all flew out with me early in the morning. I had decided to get settled at our hotel and then sprint to the hallowed Disney Park property right away. We were all itching to hear that mystically endearing park theme music, discover secret hidden Mickeys on random pavement tiles, and skip happily along the esplanade. In true Charin fashion my eyes became sappily misty the second we crossed the border in to Disneyland property. I can quite literally sense that child-like fun and adventure await me every time I cross that unseen border in to wonder... er I mean Disneyland. As we went through the security checks, the cast members/security guards greeted us with a happy grin, bid us a magical day, cracked innocent jokes here and there and made me realize that not every security guard in the world is like every one I've met at O'Hare airport- Grumpy. Off we galavanted to Downtown Disney for our only adventure for that day- shopping!

IMG_1687.jpg
IMG_1688.jpg
IMG_1691.jpg
IMG_1692.jpg
IMG_1693.jpg

First stop was the colossal Lego Store in which my nephew, Ezra's dream came true. Unlike that of (most) grown adults, Ezra's dream is quite simple- be surrounded by legos, play with legos, and maybe... Just maybe... Add a Lego set to his prized collection, and that is what we did. And Ezra rejoiced. Thoroughly. I will also add that that kid sure deserved his dream coming true right at the outset of our trip as he was the only boy in our party of 9, and he was an absolute peach of a prince to us ladies throughout our wild adventure.

IMG_1694.jpg
IMG_1698.jpg

We strolled through a few stands here and there, buying a dainty tiara for Maddy (my 12 year old niece) and I to share, as well as a "gypsy Minnie" pin for nana (my mom). The golden moment of that whole day, though, happened at my favorite shop of any theme park I have ever been to, WonderGround Gallery. This small shop features Disney inspired art by professional artists, many of whom are local to California. If you did not know, many Californians are like me in that, Disneyland holds a sacred gleeful childhood piece to their heart. So you can imagine if renowned local artists are creating pieces for somewhere that holds such a precious emotional place, the artwork will inevitably be truly and beautifully inspired. That's what it is. Every time I walk in to this shop I am in awe at the new takes and interesting perspectives these artists have come up with for classic, and new Disney/Pixar stories and characters. Truth be told, while I like classic Disney movies, it is Pixar films that hold my heart and inspire me. The artistic and thoughtful approach I see reflected in the artwork in WonderGround Gallery always makes me think twice about the depth a classic Disney character may have though.

My 11 year old niece wants to work for Disney some day, and in particular wants to be a story board artist for Disney. She is truly in love with all things Disney, and she truly is a talented young artist. When she walked in to this store her whole being lit up to see every array of artistic possibility you could take to the characters and stories she knew so well. She bounced cheerily from one artist showcase to the next, awe inspired at each, but when she reached the center of the room she stopped, mesmerized at what she saw. An actual real, live Disney sketch artist sketching a scene from one of her favorite movies, Up. For this inquisitive and ingenious youthful artist it was enough just to watch and be inspired by the talent that lay before her. She drew closer with longing admiration and exclaimed sweetly, "That is SO AWESOME!" The artist looked up from her work, smiled, thanked her, and asked her name. "Alaska!" She happily replied, still fully mesmerized by her handiwork. The artist finished up her sketch, and at the top she wrote "Alaska". She turned to the stunned little lady and handed her the piece of art she had just finished. To put it plainly, Alaska was beside herself with sheer joy. She could not believe she got to keep a professional piece of artwork from someone who had her dream job. She also could not believe that this piece, professionally framed and worth about $40 (which would have taken her months of scrimping and saving to collect by herself), was purely a gift, no strings attached, but it most certainly was. No ulterior motive, no gimmick, no hoop we would have to jump through, it was just a lovely gift from one artist to another. This, my friends, in the Disney parks fan world is called "Disney Magic" and it's a cheesy way of saying "random act of amazing kindness", and it is really beautiful to be a part of, not only on the receiving end, but also on the end that gives the Magic too. Alaska eyes watered up with joy, as did mine, and as did her older sister Maddy's, as we all knew this was a completely beautiful and inspiring moment for Alaska, our beloved niece and sister, the gifted, talented, and dream-filled artist whose hope was to one day accomplish the art that she now possessed at no cost to her.

IMG_1700.jpg
IMG_1701.jpg
IMG_1704.jpg
IMG_1706.jpg
IMG_1708.jpg

Unbelievably, that Magic did not cease here. That night my 2 newly adopted nieces, sister, and mom arrived. The next morning all 9 of us awoke bright and early and made our way to Disneyland as the sun was rising in front of us, and soon after we arrived at the gate one of my Disneyland visit dreams came true. Whilst not-so-quietly holding in our thorough anticipation for the park to open, a cast member came up to us and asked what was written on our t-shirts. Someone replied, "It says, 'We're celebrating the adoption of Carin and Yvette Youngren!'" "Well how wonderful is that, congratulations!" The cast member said in return, "How would you all like to help me open the park today? When I give the go ahead you will all come through the gates and be the first to enter Disneyland today, then you will stand in the middle of the entrance and eagerly lead a countdown to when we officially open the park, once the countdown is done you will holler, 'Let the Magic begin!!!' Does that sound like something you would like to do?" "Uh... This has been something I would like to do since I was 7 years old, sir, that's 24 years of waiting for this precise moment, so... YES FOR THE LOVE OF ALL THAT IS MICKEY, YES!", is what I said in my head but outwardly I replied, "Yes, yes we would LOVE to do that." and then frantically tried to save my giddy 7 year old childlike jump for when he walked away back to his very important magical work. In case you are new to this whole theme park world, this task is given to one lucky family every morning. Everyone that goes to the park at opening time must line up and stand behind gates, once it gets to park opening time these lines usually form a sea of people anxiously gazing past the gates in to the lush greenery of Disneyland, eagerly waiting to be let in. One family is chosen by cast members before the park opens to be the family that does exactly what was spelled out to us. I know it sounds weird to be excited over opening a park that is open 365 days of the year... Eh, who am I kidding, it is weird, but it's a good weird, it's a me weird, and it's the weird that I love about myself. I have wanted to be a part of the family that opens the park for so long simply because it is a moment when you, a park-goer, get to share Disney Magic with your fellow park goers that day. We waved, smiled, and clapped at complete strangers, we yelled that countdown like it was up to us to shatter the windows of Main Street, and we did our absolute best to rile everyone up and give them some joy for their day at Disneyland. I had seen other families do this and felt oddly connected to them as we were both so thoroughly excited to experience moments of basking in being a carefree kid for that one day. It was our duty to spread that sunshine and sincere love in that very first moment of the day and boy did we ever take on the task with heartfelt revelry.

This story will continue next week with even more celebratory episodes of our adventure (one in which my nieces got to lead an impromptu procession around ToonTown hand in hand with Donald and Daisy to celebrate their adoption), believe me you won't want to miss out on the rest of the story. For now, I will leave you with a celebratory and fun cake recipe, the cake that I made for my niece, Carin, on her birthday. It is a sweetly fun and childlike cake, much like the story I am telling you, I hope you enjoy and see you next week for part two!

Sprinkle Me Pink Celebrate Cake (aka funfetti cake)

Ingredients: 

1 cup (2 sticks) unsalted butter, room temperature, plus more for pans
2 1/2 cups all-purpose flour (spooned and leveled), plus more for pans
1/2 teaspoon baking powder
1/2 teaspoon baking soda
1 teaspoon salt
1 1/2 cups sugar
2 large eggs
3 large egg yolks
2 teaspoons pure vanilla extract
1 cup low-fat buttermilk
1/2 cup Rainbow "Jimmie" Sprinkles

Directions: 

Preheat oven to 350 degrees. Butter and flour two 8" round cake pans, tapping out the excess flour.

In a medium bowl, whisk together flour, baking powder, baking soda, salt.

Using an electric mixer, beat butter and sugar together until light and fluffy. With mixer on low, beat in eggs and yolks, one at a time, fully incorporating with each addition. Alternately beat in flour mixture and buttermilk mixture beginning and ending with the flour mixture; mix just until combined. Very VERY carefully fold in the sprinkles. This should be done in no more than 4 folds as the colors do run very VERY quickly.

Divide batter between pans; smooth tops. Bake until cakes pull away from sides of pans, 32 to 35 minutes. Let cool in pans 10 minutes. Run a knife around edges of pans and invert cakes onto a wire rack.


Vanilla Buttercream

Ingredients:

1 ¼ cups sugar
5 large egg whites
2 cups (4 sticks or 1 pound) unsalted butter, room temperature, cut into pieces
1 tablespoon vanilla extract (I recommend using a higher quality extract for this, like Nielsen Massey or make your own!) 

Directions:

Place egg whites and sugar in a heatproof bowl set over a pot of simmering water. Whisk until sugar has dissolved and egg whites are hot to the touch. Test by rubbing the mixture between your fingers; it should feel completely smooth.

Remove from heat, and pour mixture in to a stand mixer bowl. Using the whisk attachment, beat on high speed until mixture has cooled completely and formed stiff and glossy peaks, about 10 minutes.

On medium-slow speed whisk in the vanilla until completely incorporated. 

Add the butter, one piece at a time, and beat until incorporated after each addition. Whisk until smooth.

*Disclaimer- I do not own these recipes. They are recipes that I adapted from Martha Stewart recipes for vanilla cake and vanilla buttercream.


Assembly

Note: If you are unfamiliar with leveling, cutting, or frosting cakes I would suggest checking out this tutorial before this next step. 

Level each cake layer. Place about 1 1/2 cups of buttercream in to a bowl and tint it with your choice of food coloring (I prefer Americolor gel food coloring). Repeat this process with another color of your choice. Fill 2 piping bags, one fitted with a 12mm french piping tip, the other fitted with an 11mm french piping tip, about 1/2 full of the colored buttercream. Place the first layer of cake on a disposable cake round or cake plate. Fill the first layer with enough white buttercream to form a 1/2" layer, making sure a small amount spills over the sides evenly. Place a layer of cake over the filling. Frost the cake with remaining white buttercream. Pipe rosettes (Same basic method as this tutorial that shows you how to cover an entire cake with rosettes, but I used different piping tips, feel free to use the same 1mm star tips from the video if you want that specific look) along the bottom border and top edge of the cake. Lightly sprinkle the top with your choice of sprinkles/edible tiny decorations/fairy dust. That's it, munch away on this fun little beauty, it tastes delicious and is great for both kids and kids at heart.

Tags Disneyland, Disney, cast members, celebration, adoption

baker Jekyll and Mrs. Hyde

Charin Kent August 25, 2016

I’d rather be honest than impressive. 

So here I go…

I need people. I am an introvert… I like to be in control of when and how I interact with people, I like to keep to myself and a few close friends at parties (even ones that I host). I like to spend hours on end by myself quietly working on a project, reading a book, or drive many hours listening to music and pondering the deep inner workings of life. I would have to be by myself for a LONG time before I would feel lonely. My default is to try and do what I want and need to do when I want to do it, and depend on people as little as possible, not because I want all the credit or recognition for what I do but simply so that I can sit in the independence that I hold dearly and tell myself "I did it all by myself" like a 2 year old. 

The problem is... What happens when the shit hits the fan? What happens when, try as I might, I literally cannot accomplish something by myself? 

Well the shit did hit the fan several months ago and my response to this rare-up-until-that-point occurrence was the same as it has been my whole life. A mental pattern arises which looks like this: “I will try and get task x done because I have to get x done, period, no questions about it, I will get task x done at all costs.” Task x is attempted… “Holy crap… task x cannot be accomplished, why can’t I accomplish task x? I am a worthless person for not being able to accomplish task x, I am a failure for not being able to accomplish task x, I am a horribly lazy person for not being able to accomplish task x. AAAHHHH… task x still needs to get done, what am I going to do? I can’t ask for help because I should be able to accomplish task x, so I don’t deserve help. Asking for help to get task x accomplished is admitting to someone else that I can’t accomplish task x which is completely humiliating because… I should be able to accomplish task x! I will attempt task x again and see if I was just not trying hard enough the first time.” Task x is attempted again… “Well that was a complete and utter waste of energy, I guess I wasn’t just imagining I couldn’t accomplish task x, I really truly can’t… NOW WHAT?” I could go on and on with this dialogue, it doesn’t sound this way every time, there are always different versions of how this goes down but the bottom line is, I feel like a worthless, humiliating failure if I don’t accomplish what I think I should be able to accomplish how I want to accomplish it, which usually means BY MYSELF. Don’t get me wrong, there are plenty of times when task x IS technically accomplished but… then I cannot accomplish tasks y and z the next day because I spent all my energy on task x… and so the problem is not truly solved. 

To make things a bit clearer, these days task X is things like, cleaning my house, take care of my kids immediately in the morning, eat healthy meals, exercise at least 3 times a week, baking a cake… unfortunately due to the nature of living with a chronic illness the list goes on and on and on of things I have trouble accomplishing daily. Some of these tasks need to be given a closer examination and thrown out entirely, but others… they need to be done if I want my family and I to live both physically and emotionally happy, healthy lives. I have tried to accomplish these tasks on my own terms and with as little help as humanly possible, and it simply does not work long term. 

So I have forced myself to face a fact that I have skirted around and ignored way too often: I need people. 

And I am not a lazy, worthless, humiliating failure for needing them. Refusing help, when I obviously need it, just so that I can accomplish the task by myself and say “I did it all by myself” is actually really selfish… and childish… and stuck up. You know what? There is an incredible thing that comes from asking and looking for help that I have been completely missing out on… Task x can get accomplished even when the shit hits the fan… go figure?! 

I say all of this for one simple reason. I’d rather be honest than impressive. Spending hours baking a cake can send my muscles into horrible pain the next few days and I struggle washing the mountains of dishes that come from said baking adventure, much less taking care of my 2 young energetic, talkative, ever extroverted children. I have tried to do it all myself and the result is that at best nothing gets accomplished and at worst nothing gets accomplished and things are made even worse from attempting to get the tasks accomplished. 

So… I have made the leap and started getting help, the help I now need. Starting in September I will have a part time nanny helping care for my children so I can have time to focus on taking care of my body and life. I have hired a house keeper to clean my house once a month, and I am simply accepting offers of help from friends and family as they come up or as I need them. In all honesty I was scared to write exactly how I am getting help (due to the reasons I mentioned above as well as other reasons I won’t go in to here), but my hope is that it’d encourage someone out there who is struggling with the same or similar thoughts like my own to know that reaching out and asking for help is not a sign of weakness or failure, and you are not alone. It’s on all of us to ask for help when we really need it and help others when and as we can. It’s also on all of us to not judge one another as better or less than simply based on the life and circumstances we find ourselves in, be them joyous or heartbreaking. I am not doing my life alone, or even attempting to do it alone anymore. It’s not an impressive step to lean on others, but it is an honest one that embraces who I really am - scars, buzzing hands and feet, fuzzy brain and all. 

I have had people and family around me constantly the last month. All in all I have had 4-7 extra people living in my house and in the midst of that I took a trip out to be with my husband’s family in Colorado for a short summer vacation together. Normally this would send my introverted little self from kind Dr. Jekyll into sinister Mr. Hyde mode faster than you can say “CAKE!” But with this new leaf turned, I decided to embrace it, ask for help with my kids as needed, and ask for time out and away as I need it. The result was that my family embraced me with loving arms, my house is clean, my kids are happily entertained, and I was able to do some fun things I have had to forgo in recent months, the main one being hosting a party. The worst thing that happened was that my pride died. A lot. The best thing was that I feel closer to my family and appreciate them more than I have ever before. 

The pictures and recipe that follow are from some fun celebrations and a party I had the opportunity to make cakes for, each of which were inspired by and for a different family member that was in town. I'm posting one cake recipe this week that was specifically made for my mom who has multiple health issues and dietary restrictions and I will post the other two recipes next week. I hope you enjoy the family fun and recipes... and I can't hold it in any longer, I'M GOING TO DISNEYLAND THIS WEEKEND TO CELEBRATE MY NIECES' ADOPTION! Stay tuned for a post in the next couple weeks where I completely GEEK OUT and write about my happiest place on earth!!!

IMG_1362.jpg
IMG_1372.jpg
IMG_1352.jpg

From left to right, my favorite old fashioned Vanilla Cake and Vanilla buttercream recipe, made for my newly adopted niece, Carin's birthday; my nephew, daughter, and 4 nieces right after they found out they were all going to celebrate the adoption of their cousins in Disneyland together; happy birthday Carin!

IMG_1506.jpg
IMG_1514.jpg

Dearly sweet friends and family helping host a LuLaRoe clothing and Encantadora Jewelry party; a carrot ginger cake with citrus orange cream cheese frosting made for the party but inspired by my wonderfully amazing sister.

IMG_1660.jpg
eat cake for breakfast mom.jpg

So unfortunately, and yet sadly fortunately, chronic illness is not a new thing in my family. My mom has multiple chronic illnesses and has been my shoulder to cry on and helpful support group through everything that has happened to me. One of her chronic illnesses is severely affected by her diet. Amongst many other things, she cannot eat any food with a discernible amount of fat content... to this baker and food loving fanatic that is a crime and horror against nature I cannot even begin imagine living with. I have come up with a cake recipe that she can eat, and while she is totally enamored with this cake, it saddens my soul that she cannot enjoy the cakes that my freely inspired spirit would whip up for her if there were no dietary restraints in place. The recipe that follows is for a Red Velvet cake with Marshmallow frosting. The substitutions I made for her dietary needs are in parenthesis, but I wanted to post the original as well as these recipes and combination are absolutely delicious, especially if you pair it with this chocolate ganache glaze filling, which I wasn't able to with this cake but you can try at home!

Red Velvet Cake (Almost No-Fat substitutions in parenthesis)


Ingredients: 

2 1/2 cups flour

2 tablespoons cocoa powder (replace with 2 additional tbsp of flour)

1 teaspoon salt

1 1/2 cups sugar

1 1/2 cups vegetable oil (replace with applesauce) 

2 large eggs, room temperature

1/2 teaspoon red gel-paste food color

1 teaspoon pure vanilla extract

1 cup buttermilk

1 1/2 teaspoons baking soda

2 teaspoons distilled white vinegar


Directions: 

Preheat oven to 350 degrees. Spray 2 8" round cake pans with cooking spray oil or butter and flour cake pans.

Whisk together flour, cocoa, and salt (or whisk together flour and salt if omitting the cocoa powder).

With an electric mixer on medium-high speed, whisk together sugar and oil (or applesauce) until combined. Add eggs, one at a time, beating until each is incorporated, scraping down sides of bowl as needed. Mix in food color and vanilla.

Reduce speed to low. Add flour mixture in three batches, alternating with two additions of buttermilk, and whisking well after each. Stir together the baking soda and vinegar in a small bowl (it will foam); add mixture to the batter, and mix on medium speed 10 seconds.

Divide batter evenly among cake pans. Bake, rotating pans halfway through, until a cake tester inserted in center comes out clean, about 30 minutes. Transfer pans to wire racks to cool completely before inverting cakes.


Marshmallow Frosting


Ingredients:

3 large egg whites

 1 1/4 cups sugar

1/4 cup water

1/4 tsp cream of tartar

2 tsp pure vanilla extract


Directions

 Place egg whites, sugar, water, and cream of tartar in a heatproof bowl set over a pot of simmering water. Whisk until sugar has dissolved and egg whites are hot to the touch. Test by rubbing the mixture between your fingers; it should feel completely smooth.

 Remove from heat, and pour mixture in to a stand mixer bowl. Using the whisk attachment, beat on high speed until mixture has cooled and formed stiff and glossy peaks, about 10 minutes. Use immediately.


*I did not create these recipes, I adapted the red velvet cake recipe from this recipe by Martha Stewart and the Marshmallow frosting recipe I found a while ago on the internet but cannot find the source for it unfortunately.


Assembly

If you are unfamiliar with leveling and cutting cakes I would suggest checking out this tutorial before this next step. If you're a serious newbie and four layers sounds intimidating, no worries, just stick to the two layers you baked and fill with a bit more buttercream in the middle. Just be sure to still level those lovelies.  

Level one cake layer and cut it in half horizontally, then repeat with the second layer. You will now have 4 total layers of cake. Place the first layer on a disposable cake round or cake plate. Place about 3/4 cup frosting in a piping bag fitted with a French tip (I used a 10mm french tip). Fill the first layer with enough frosting to form a 1/2" layer, making sure a small amount spills over the sides evenly. Place a layer of cake over the filling. Repeat this process with the remaining cake layers. Pipe the frosting evenly around the cake in vertical rows first then in circular rings for the top. If you have a kitchen torch and know how to use it... have fun! Lightly torch the outside for that toasty effect, this part is optional but it does give an added flavor and texture to the cake. Enjoy!

when the kittens are away the mice will eat red wine chocolate cake

Charin Kent August 3, 2016

A wise woman once said, “The key to being a successful spouse and parent is to take a one week vacation by yourself (or with friends), a one week vacation with your spouse, and a one week vacation with your whole family each year. A week is just enough time for you to get dedicated and purposeful time to enjoy you, enjoy each other, and enjoy your kids.” Now… I have been a parent for just over 5 years and this will be the first year that I even come close to fulfilling this task. In April our family took a 9 day trip to California, in June I took a 5 day trip to Paris, and I am now coming to the end of a 5 day stay-cation with my husband while our kids are with relatives “farming it” in Wisconsin. While I am wary to label anything a “key to success”, I can attest to the fact that my wise Auntie Debbie was hitting on something with this advice. Parenting is hard. You can get completely lost in it. Making an effort to find dedicated carefree time for each part of the family is important.

When I heard this little piece of advice the first time (which was when my daughter was a newborn, so about 5 years ago) I thought it was completely brilliant and had every intention of making it happen. Family vacations are the easiest to execute and thus we’ve done one every year. David and I taking a trip together has been a tad more touch and go, and that trip to Paris? that’s the first “by myself” vacation I’ve ever taken. There are many reasons why those two types of vacations are so difficult to accomplish but the main one is… leaving my babies in the hands of someone else is SCARY. I am lucky in that I have relatives that I trust to take care of my kids, and yet leaving them is STILL SCARY. What if they fall and call out for me and I am not there to comfort them the way they like? What if they wake up in the middle of the night and are terrified that I am not there? What if leaving them for a week emotionally scars them forever and ever and they hate me? (ok… that last one is a little overboard but, hey I’m a mom and I worry about irrational stuff sometimes ;) ) Parenting is hard and it is extremely difficult to take a leap of faith and entrust my tiny blissful beings in to someone else’s hands, no matter how qualified they are. However, the more years of parenting I accumulate, the easier it becomes to take this leap because through countless trials I’ve learned that the wonderfully overused adage, “They will be fine, they will survive.” is completely true. What I have also found to be true is that dedicated time for my spouse and dedicated time for me is extremely important as it has given me a renewed sense of mental well being and family vision. Could we survive without it? Perhaps. Will it be feasible to accomplish it during every season of parenthood? Nope. Do I think every parent should try this at home? Maybe :) If you’re a parent with kids at home and the cookie cutter advice my aunt gave seems completely unattainable and maybe even somewhat ludicrous, I get it, but please don’t roll your eyes and scroll to the cake pictures quite yet… Yes, there are so many reasons to brush off this goal besides it just being scary to leave your kids. 3 weeks of vacation, that’s a lot of money and time that many cannot spare, yes I understand that. However, I won’t relent in encouraging you, oh exhausted parent that I know you are, to consider how you can prioritize some amount of carefree and fun time for yourself, for your spouse (if you’re married, if you’re a single parent, I believe double time for yourself should be in order :) ), and for your family because each of you completely deserve it. It may not be a week, but consider what is feasible for you, take a leap of faith, and go for it! If you are reading this and aren’t a parent with kids in the house… thanks for stopping by! A fun cake recipe is coming ;) On a more serious note though, maybe consider helping a parent get some of that time? Obviously it doesn’t have to be a week (but hey if you want to offer that, by all means!) but maybe consider babysitting for free some time, I can speak from personal experience, it means SO MUCH to us parents! 

It didn’t take me very long at all to figure out what cake to make this week. We had no children nipping at our heels for cake scraps so of course… it must be booze filled! It’d been years since I’d made this Red wine Chocolate cake, and I wanted to douse it with the good stuff because once, again, I had no children nipping at my heels begging for second and third bites of my slice of cake. I headed over to The Spice House in Old Town here in Chicago and bought some high quality cinnamon, cocoa powder, and vanilla. Then I crossed the street to La Fournette to pick up some amazing raspberry jam for the filling. I lived a bit adventurously with the cake recipe, it’s adapted from this one from Smitten Kitchen though it may not seem so at first glance. I added a bit more spice and used a red wine from Spain that was spice and fruit forward, the end result was fun and David and I enjoyed every wine-filled bite! While it has been a lovely week, those tiny blissful beings are sorely missed and will be heartily welcomed back tomorrow by two refreshed parents.

Red Wine Chocolate Spice Cake

Ingredients:

12 tbsp unsalted butter, at room temperature
1 1/2 cup firmly packed dark brown sugar
1/2 cup white granulated sugar
2 large eggs + 2 large egg yolks
1 ½ cups red wine (a spicy and fruit forward red wine will be best)
2 tsp vanilla extract
2 cups + 1 tbsp all-purpose flour
1 cup cocoa powder
1/4 tsp baking soda
2 tsp baking powder
1/2 tsp salt
1/2 tsp ground cinnamon
¼ tsp nutmeg

Directions:

Preheat the oven to 325°F.

Butter 2 8-inch round cake pans (or medium sized heart shaped pans like I used) then line them with parchment paper, and butter and lightly flour the parchment.

Sift the flour, cocoa, baking soda, baking powder, cinnamon and salt together in to a bowl, mix together with a whisk and set aside.

In a large bowl, on the medium speed of an electric mixer, cream the butter until smooth. Add the sugars and beat until fluffy, about 3 minutes. Add the eggs and yolks and beat well, then the red wine and vanilla. Don’t worry if the batter looks a little uneven. Pour the dry ingredients directly over the wet and slowly mix until 3/4 combined, then fold the rest together with a rubber spatula.

Spread batter in prepared pans. Bake for 30 to 35 minutes, or until a cake tester inserted into the center comes out clean. The top of the cake should be shiny and smooth, like a puddle of chocolate. Cool in pan on a rack for about 10 minutes, then flip out of pan and cool the rest of the way on a cooling rack. This cake keeps well at room temperature or in the fridge. 

Chocolate Glaze

Ingredients: 

6 oz high quality dark chocolate, finely chopped
2/3 cup heavy whipping cream
1 tbsp corn syrup

Directions:

Place chocolate in a medium size heatproof bowl. Bring the cream and corn syrup just to a simmer in a small saucepan over medium heat; pour mixture over chocolate. Let stand, without stirring, until chocolate just begins to melt (about 45 seconds). With a whisk, and starting at the center of the bowl, whisk in a small circular motion clockwise increasing the size of your circle until the ganache is 75% incorporated then start whisking counter-clockwise just until the ganache is silky and fully mixed together. do not over mix or you'll be sorry :)

Assembly

Ingredients: 

8 oz high quality raspberry jam
35-40 fresh raspberries, half whole, half cut in half length-wise

Place a layer of cake on to a disposable cake round or cake plate. Fill this layer with enough raspberry jam to completely cover the cake but don't let any spill over the sides or reach the edge. Place the other layer of cake over the filling. There should only be a small amount of filling showing through the layers. Gently pour about half the glaze over the cake and smooth out the top, ensuring any glaze that spills over the sides gets smoothed around the cake as well. Pour half of the remaining glaze over the  top and smooth out excess again. Use remaining glaze to cover any open patches of cake, using an offset spatula to smooth out and glaze the whole cake. Decorate with fresh raspberries by arranging whole raspberries on top and arranging halved raspberries around the bottom. Cut and enjoy sans kids in tow as that wine does not completely bake out ;)

Older →
Embracing the moments of bliss no matter how tempestuous the storm.

Embracing the moments of bliss no matter how tempestuous the storm.